
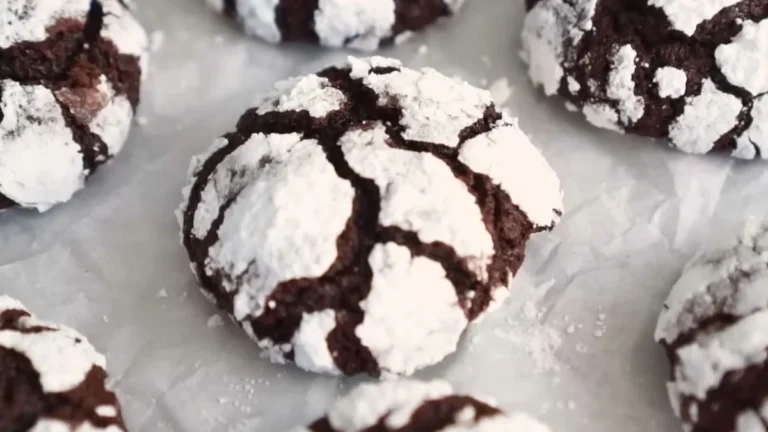

If you have ever watched John Kanell of Preppy Kitchen bake his iconic Chocolate Crinkle Cookies and immediately wanted to recreate them at home, this is the recipe for you.
These fudgy, brownie-like chocolate cookies are rolled in a generous coating of powdered sugar before baking, then crack open in the oven to reveal stunning snowy crinkle patterns across a deep, dark chocolate surface.
Made with Dutch-processed cocoa powder, a hint of espresso powder, and a rich oil-based dough that chills overnight, these cookies deliver an irresistibly soft, chewy center with a delicately crisp exterior. Perfect for holiday cookie boxes, bake sales, or anytime you need a guaranteed crowd-pleaser.
What Do Chocolate Crinkle Cookies Taste Like?
Chocolate crinkle cookies taste exactly like a rich, fudgy brownie in cookie form -and that is precisely what makes them so irresistible. The Dutch-processed cocoa powder gives the cookies a deep, intense chocolate flavor that is smooth and slightly earthy rather than sharp or bitter.

A touch of optional espresso powder quietly amplifies the chocolate without adding any detectable coffee taste. The interior is soft, dense, and almost molten-like when fresh from the oven, while the powdered sugar coating creates a thin, barely-there crisp shell that crackles beautifully with every bite.
These cookies are deeply satisfying, rich without being heavy, and completely impossible to eat just one of.
Ingredients & Kitchen Equipment
Ingredients
- All-purpose flour -2 cups (240 g)
- Baking powder -2 teaspoons
- Salt -¾ teaspoon (preferably sea salt)
- Granulated sugar -1¾ cups
- Vegetable oil -½ cup (120 mL) (olive oil also works)
- Large eggs -4, at room temperature
- Cocoa powder -1 cup (Dutch-processed preferred for deeper color and milder flavor)
- Espresso powder -½–1 teaspoon (optional but recommended)
- Vanilla extract -2 teaspoons (optional)
- Powdered sugar -generous amount for rolling (enough to coat all cookies twice if needed)
Kitchen Utensils
- Stand mixer with paddle attachment (or hand mixer)
- Large mixing bowls
- Sifter or fine mesh sieve
- Rubber spatula or bowl scraper
- Plastic wrap or airtight container (for chilling dough)
- Baking sheets (2 or more)
- Parchment paper or silicone baking mats
- Cookie scoop or tablespoon measure
- Wire cooling rack
- Small shallow bowl (for rolling in powdered sugar)
Preparation Time, Cooking Time & Servings
- Prep Time (Day 1): 20 minutes
- Chill Time: Overnight (minimum 8 hours, up to 3–4 days)
- Bake Time (Day 2): 10–12 minutes per batch
- Total Active Time: ~35 minutes
- Yield: 2–3 dozen cookies (depending on scoop size)
- Difficulty: Easy
How to Make Preppy Kitchen Chocolate Crinkle Cookies
Day 1 -Make the Dough
Step 1 -Mix the Dry Ingredients
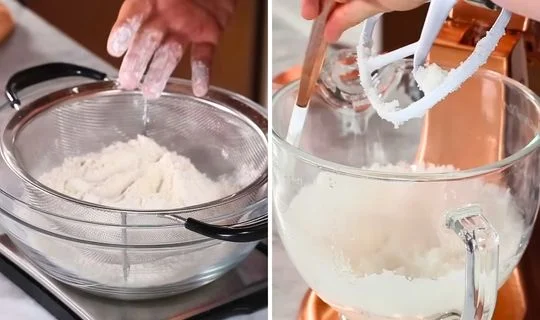
Sift the all-purpose flour into a large bowl. Add the baking powder and salt, then whisk everything together until evenly combined. Set aside. Sifting the flour is an important step here -it removes any lumps and ensures a smooth, lump-free dough that bakes evenly.
Step 2- Cream the Sugar and Oil
In the bowl of a stand mixer fitted with the paddle attachment (or use a hand mixer), combine the granulated sugar and vegetable oil. Mix on medium speed until the mixture looks light, fluffy, and cloud-like. This step aerates the dough and gives the cookies their characteristic lift and crinkle pattern during baking.
Step 3 -Add the Cocoa Powder
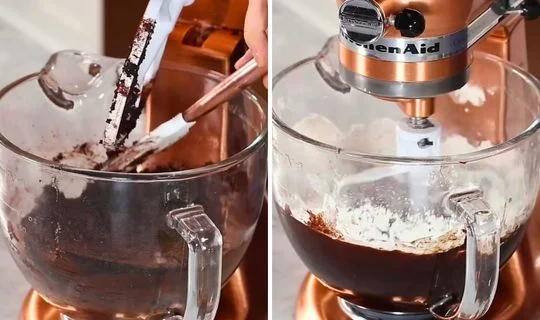
Add the cocoa powder to the sugar and oil mixture and mix on low speed until fully combined. Scrape down the sides and bottom of the bowl with a rubber spatula to ensure no dry cocoa pockets remain. Dutch-processed cocoa is strongly recommended here for a deeper color and a smoother, less acidic chocolate flavor.
Step 4 -Add the Eggs
Add the room-temperature eggs one at a time (or two at a time), mixing well after each addition and scraping the bowl as needed. Using room-temperature eggs is important -cold eggs can cause the oil-based mixture to seize or separate, resulting in an uneven dough texture.
Step 5 -Add Espresso Powder and Vanilla
Mix in the espresso powder and vanilla extract. The espresso powder is optional but highly recommended -it deepens and intensifies the chocolate flavor without making the cookies taste like coffee. Even half a teaspoon makes a noticeable difference in the final depth of flavor.
Step 6 -Fold in the Flour Mixture
Add the sifted flour mixture to the wet ingredients and mix just until combined. Do not overmix. The dough will look extremely soft, wet, and almost like cake batter at this stage -this is completely normal and expected. The long refrigeration period is what transforms this loose batter into a scoopable dough.
Step 7 -Chill the Dough Overnight
Cover the dough tightly with plastic wrap pressed directly onto the surface, or transfer it to an airtight container. Refrigerate overnight (minimum 8 hours) or up to 3–4 days. The dough must chill thoroughly -it will firm up significantly in the fridge, though it will remain soft and sticky compared to standard cookie dough.
Chilling the dough for a full 24 hours (rather than just overnight) produces even fudgier, more flavorful cookies as the ingredients continue to hydrate and meld together in the refrigerator.
Day 2 -Bake the Cookies
Step 8 -Preheat the Oven and Prepare Baking Sheets
Preheat your oven to 350°F (175°C). Line two or more baking sheets with parchment paper or silicone baking mats. Proper lining prevents sticking and ensures even browning on the bottom of every cookie.
Step 9 -Scoop and Roll the Dough
Using a cookie scoop or tablespoon, portion the chilled dough into balls approximately 1 inch in diameter (about 1 tablespoon of dough per cookie). Roll each portion between your palms into a smooth, round ball. Work quickly -the dough softens fast from the warmth of your hands.
Step 10 -Coat Generously in Powdered Sugar
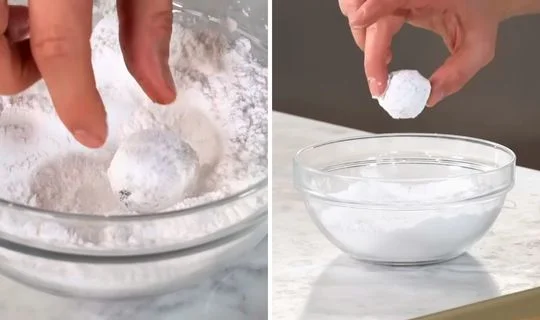
Pour a generous amount of powdered sugar into a shallow bowl. Roll each dough ball in the powdered sugar until completely and thickly coated. For the classic bold crinkle look, double-coat each ball -roll once, then roll again. In humid conditions, the sugar absorbs quickly, so an extra coating ensures those dramatic white crinkles survive the bake.
For a fun twist, blend freeze-dried strawberries or raspberries into the powdered sugar for a pink berry-coated crinkle cookie, or mix a little cocoa powder into the powdered sugar for a chocolate-dusted version.
Step 11 -Bake
Place the coated dough balls on the prepared baking sheets, spacing them at least 2 inches apart. Bake for 10–12 minutes. The cookies will puff up and develop cracks across the powdered sugar coating as they bake -this is exactly what you want. Do not overbake. The cookies will look slightly underset and soft when you pull them from the oven; they firm up to the perfect fudgy texture as they cool.
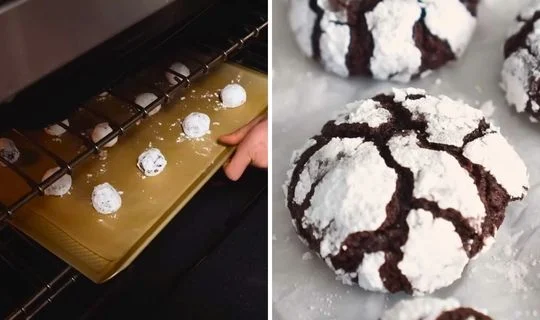
Step 12 -Cool and Serve
Allow the cookies to cool on the baking sheet for 3–5 minutes before transferring to a wire cooling rack. This resting time allows them to firm up enough to handle without breaking. Serve warm for a gooey, brownie-like experience, or allow to cool completely for a chewier, more set texture.
Customization & Serving Ideas for Chocolate Crinkle Cookies
1. Berry-Coated Crinkle Cookies with Freeze-Dried Fruit Sugar
Blend freeze-dried strawberries or raspberries with powdered sugar in a food processor until you have a fine, pale pink powder. Roll the dough balls in this fruit-infused sugar for a strikingly beautiful rose-colored crinkle cookie with a subtle berry flavor that pairs wonderfully with the dark chocolate interior.
2. Espresso Crinkle Cookies for Coffee Lovers
Double the espresso powder from ½ teaspoon to a full teaspoon and add a teaspoon of finely ground coffee to the dough for a mocha-forward crinkle cookie. Serve alongside a cappuccino or a cold brew for an elevated café-style dessert pairing that coffee and chocolate lovers will absolutely adore.
3. Peppermint Crinkle Cookies for the Holidays
Add ½ teaspoon of pure peppermint extract to the dough alongside or in place of the vanilla extract. Roll the finished cookies in a mixture of powdered sugar and finely crushed candy canes for a festive peppermint chocolate crinkle cookie that is perfect for Christmas cookie boxes and holiday dessert platters.
4. Serve Warm with a Scoop of Vanilla Ice Cream
Turn these fudgy cookies into an indulgent dessert by serving them with our Fairlife Milk Creami Recipe and Almond Horn Recipe for a delightful combination of creamy, chocolatey, and nutty flavors.
5. Spiced Mexican Chocolate Crinkle Variation
Add ½ teaspoon of ground cinnamon and a tiny pinch of cayenne pepper to the dough for a Mexican hot chocolate-inspired crinkle cookie. The warm spice builds slowly on the palate after the initial hit of chocolate, creating a complex, layered flavor experience that is both surprising and deeply satisfying.
6. Package as Holiday Cookie Gifts
Stack 6–8 cooled chocolate crinkle cookies and wrap them in clear cellophane tied with a ribbon for a beautiful homemade gift. Their dramatic black-and-white appearance makes them one of the most visually impressive cookies to gift, and they hold up well for 3–4 days at room temperature -making them ideal for shipping or gifting ahead.

7. Serve on a Dessert Board with Complementary Flavors
Arrange the chocolate crinkle cookies on a dessert charcuterie board alongside fresh strawberries, raspberries, salted caramel dip, crushed pistachios, and squares of dark chocolate. The crinkle cookies serve as the visual centerpiece and anchor of the board, balancing rich, fruity, and salty elements for an impressive entertaining spread.
Pro Tips for Perfect Chocolate Crinkle Cookies Every Time
1. Do Not Skip the Overnight Chill – It Is Non-Negotiable
Unlike most cookie doughs that benefit from chilling, this oil-based dough absolutely requires it. Without the overnight rest, the dough is far too soft and sticky to roll into balls, the cookies will spread into flat discs in the oven, and the crinkle pattern will not develop properly. Plan ahead and make the dough the day before you want to bake.
2. Use Dutch-Processed Cocoa for the Deepest Chocolate Flavor
Dutch-processed cocoa has been treated to reduce its natural acidity, resulting in a darker color and a smoother, richer chocolate flavor compared to natural cocoa powder. While natural cocoa will work in a pinch, Dutch-processed cocoa is what gives Preppy Kitchen chocolate crinkle cookies their signature deep, dark, almost-black color and intensely satisfying flavor.
3. Measure Flour Correctly -Spoon and Level, Don’t Scoop
Scooping flour directly from the bag with your measuring cup compacts it and can add up to 20% more flour than intended, resulting in dry, dense cookies that don’t crinkle properly. Always spoon flour into your measuring cup with a separate spoon, then level it off with a straight edge. Better yet, use a kitchen scale and measure exactly 240 grams.
4. Keep Your Hands Cold When Rolling
The chilled dough warms quickly from the heat of your hands, making it sticky and difficult to roll smoothly. Run your hands under cold water before rolling, dry them completely, then work quickly. If the dough becomes too soft mid-session, pop the remaining portion back in the refrigerator for 10–15 minutes before continuing.
5. Be Extremely Generous with the Powdered Sugar Coating
The most common mistake when making chocolate crinkle cookies is not using enough powdered sugar. A thin coating will partially dissolve during baking, leaving patchy, faded crinkle marks rather than the bold, snowy white cracks you’re after. Press each dough ball firmly into the sugar, roll to coat on all sides, then roll a second time for guaranteed picture-perfect crinkles.
6. Pull the Cookies Out While They Still Look Underdone
Chocolate crinkle cookies are notoriously easy to overbake because their dark color makes it nearly impossible to gauge doneness by appearance alone. Set your timer for 10 minutes and pull the cookies out while they still look slightly puffed and just barely set in the center. They will continue to cook on the hot baking sheet for several minutes after removal. Overbaked crinkle cookies lose their fudgy center and become dry and crumbly.

7. Cool on the Baking Sheet Before Transferring
Resist the urge to immediately move the cookies to a cooling rack the moment they come out of the oven. The cookies are very fragile when hot and will crack or crumble if handled too soon. Allow them to rest on the baking sheet for at least 3–5 minutes so they firm up enough to transfer cleanly. This also allows the powdered sugar coating to set into its final crinkled appearance.
Storage & Reheating Guidance
Store cooled chocolate crinkle cookies in an airtight container at room temperature for up to 4 days. For longer storage, freeze in a single layer for up to 2 months. Thaw at room temperature for 20 minutes or warm in the microwave for 10–12 seconds to restore that fresh-baked, fudgy texture.
Frequently Asked Questions About Chocolate Crinkle Cookies
Here, we’ve got you covered with some common questions that people often ask.
Why did my chocolate crinkle cookies not crinkle?
The most common reasons crinkle cookies fail to develop cracks are: the dough was not chilled long enough, the powdered sugar coating was too thin, the oven temperature was too low, or the cookies were placed on a warm baking sheet. Make sure the dough is thoroughly cold, coat generously in powdered sugar (twice if needed), preheat your oven fully, and always bake on a cool, room-temperature lined baking sheet.
Can I make the dough and bake it the same day?
Technically you can, but the results will be significantly inferior. The dough will be far too soft to roll into balls, the cookies will spread excessively, and the crinkle pattern will not develop properly. At an absolute minimum, chill the dough for 4 hours -but overnight or a full 24-hour chill is strongly recommended for the best texture, flavor, and crinkle development.
Can I use natural cocoa powder instead of Dutch-processed?
Yes, the cookies will still bake and taste good with natural cocoa powder. However, natural cocoa is more acidic, which can slightly affect the rise and texture of the cookies, and it produces a lighter brown color rather than the deep, dramatic near-black that Dutch-processed cocoa delivers. If using natural cocoa, consider reducing the baking powder very slightly to compensate for the extra acidity.
Why is there no butter in this chocolate crinkle cookie recipe?
This is an intentional, oil-based dough rather than a butter-based one. Vegetable oil produces a moister, denser, fudgier cookie because oil stays liquid at room temperature (unlike butter, which solidifies as it cools). This is what gives chocolate crinkle cookies their characteristic brownie-like interior. The tradeoff is that the dough must be thoroughly chilled before it can be handled and rolled.
How do I keep the powdered sugar from melting on crinkle cookies?
The powdered sugar will naturally absorb some moisture from the dough during baking -this is what causes the crinkle effect. To ensure enough white sugar remains visible after baking, coat each dough ball twice rather than once. In very humid environments, you can also try mixing a small amount of cornstarch into the powdered sugar, which helps it resist moisture absorption.
Can I freeze chocolate crinkle cookie dough?
Yes! The dough freezes beautifully. After chilling overnight, scoop the dough into balls, roll in powdered sugar, and freeze on a baking sheet until solid. Transfer to a zip-lock freezer bag and store for up to 2 months. Bake directly from frozen, adding 2–3 extra minutes to the bake time. This makes them incredibly convenient for fresh-baked cookies on demand.
How do I know when chocolate crinkle cookies are done baking?
Because the dough is very dark, you cannot rely on color to gauge doneness. Instead, look for these visual cues: the cookies will have puffed up noticeably, the surface will have developed clear cracks through the powdered sugar, and the edges will look set while the center still appears very slightly soft. Remove them at this point -they will firm up to the perfect fudgy texture as they cool on the baking sheet.
What is the best way to get uniform cookie sizes?
Use a cookie scoop (also called a disher) with a 1-tablespoon capacity for perfectly uniform cookies that bake evenly. Inconsistent sizes lead to uneven baking -smaller cookies will be overbaked by the time larger ones are done. A cookie scoop is one of the most valuable and inexpensive tools for any home baker serious about consistent results.
Preppy Kitchen Chocolate Crinkle Cookies Recipe
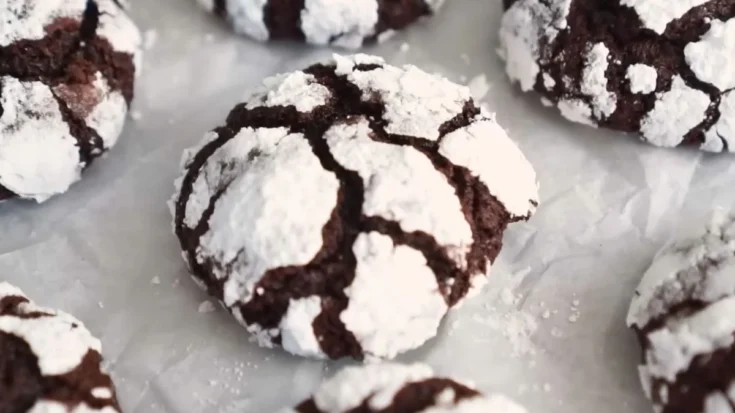
If you have ever watched John Kanell of Preppy Kitchen bake his iconic Chocolate Crinkle Cookies and immediately wanted to recreate them at home, this is the recipe for you.
Ingredients
- All-purpose flour -2 cups (240 g)
- Baking powder -2 teaspoons
- Salt -¾ teaspoon (preferably sea salt)
- Granulated sugar -1¾ cups
- Vegetable oil -½ cup (120 mL) (olive oil also works)
- Large eggs -4, at room temperature
- Cocoa powder -1 cup (Dutch-processed preferred for deeper color and milder flavor)
- Espresso powder -½–1 teaspoon (optional but recommended)
- Vanilla extract -2 teaspoons (optional)
- Powdered sugar -generous amount for rolling (enough to coat all cookies twice if needed)
Instructions
Day 1 -Make the Dough
Step 1 -Mix the Dry Ingredients
Sift the all-purpose flour into a large bowl. Add the baking powder and salt, then whisk everything together until evenly combined. Set aside. Sifting the flour is an important step here -it removes any lumps and ensures a smooth, lump-free dough that bakes evenly.
Step 2- Cream the Sugar and Oil
In the bowl of a stand mixer fitted with the paddle attachment (or use a hand mixer), combine the granulated sugar and vegetable oil. Mix on medium speed until the mixture looks light, fluffy, and cloud-like. This step aerates the dough and gives the cookies their characteristic lift and crinkle pattern during baking.
Step 3 -Add the Cocoa Powder
Add the cocoa powder to the sugar and oil mixture and mix on low speed until fully combined. Scrape down the sides and bottom of the bowl with a rubber spatula to ensure no dry cocoa pockets remain. Dutch-processed cocoa is strongly recommended here for a deeper color and a smoother, less acidic chocolate flavor.
Step 4 -Add the Eggs
Add the room-temperature eggs one at a time (or two at a time), mixing well after each addition and scraping the bowl as needed. Using room-temperature eggs is important -cold eggs can cause the oil-based mixture to seize or separate, resulting in an uneven dough texture.
Step 5 -Add Espresso Powder and Vanilla
Mix in the espresso powder and vanilla extract. The espresso powder is optional but highly recommended -it deepens and intensifies the chocolate flavor without making the cookies taste like coffee. Even half a teaspoon makes a noticeable difference in the final depth of flavor.
Step 6 -Fold in the Flour Mixture
Add the sifted flour mixture to the wet ingredients and mix just until combined. Do not overmix. The dough will look extremely soft, wet, and almost like cake batter at this stage -this is completely normal and expected. The long refrigeration period is what transforms this loose batter into a scoopable dough.
Step 7 -Chill the Dough Overnight
Cover the dough tightly with plastic wrap pressed directly onto the surface, or transfer it to an airtight container. Refrigerate overnight (minimum 8 hours) or up to 3–4 days. The dough must chill thoroughly -it will firm up significantly in the fridge, though it will remain soft and sticky compared to standard cookie dough.
Chilling the dough for a full 24 hours (rather than just overnight) produces even fudgier, more flavorful cookies as the ingredients continue to hydrate and meld together in the refrigerator.
Day 2 -Bake the Cookies
Step 8 -Preheat the Oven and Prepare Baking Sheets
Preheat your oven to 350°F (175°C). Line two or more baking sheets with parchment paper or silicone baking mats. Proper lining prevents sticking and ensures even browning on the bottom of every cookie.
Step 9 -Scoop and Roll the Dough
Using a cookie scoop or tablespoon, portion the chilled dough into balls approximately 1 inch in diameter (about 1 tablespoon of dough per cookie). Roll each portion between your palms into a smooth, round ball. Work quickly -the dough softens fast from the warmth of your hands.
Step 10 -Coat Generously in Powdered Sugar
Pour a generous amount of powdered sugar into a shallow bowl. Roll each dough ball in the powdered sugar until completely and thickly coated. For the classic bold crinkle look, double-coat each ball -roll once, then roll again. In humid conditions, the sugar absorbs quickly, so an extra coating ensures those dramatic white crinkles survive the bake.
For a fun twist, blend freeze-dried strawberries or raspberries into the powdered sugar for a pink berry-coated crinkle cookie, or mix a little cocoa powder into the powdered sugar for a chocolate-dusted version.
Step 11 -Bake
Place the coated dough balls on the prepared baking sheets, spacing them at least 2 inches apart. Bake for 10–12 minutes. The cookies will puff up and develop cracks across the powdered sugar coating as they bake -this is exactly what you want. Do not overbake. The cookies will look slightly underset and soft when you pull them from the oven; they firm up to the perfect fudgy texture as they cool.
Step 12 -Cool and Serve
Allow the cookies to cool on the baking sheet for 3–5 minutes before transferring to a wire cooling rack. This resting time allows them to firm up enough to handle without breaking. Serve warm for a gooey, brownie-like experience, or allow to cool completely for a chewier, more set texture.
Notes
Store cooled chocolate crinkle cookies in an airtight container at room temperature for up to 4 days. For longer storage, freeze in a single layer for up to 2 months. Thaw at room temperature for 20 minutes or warm in the microwave for 10–12 seconds to restore that fresh-baked, fudgy texture.
Nutrition Information:
Yield:
12Serving Size:
1Amount Per Serving: Calories: 80
These Preppy Kitchen Chocolate Crinkle Cookies are the ultimate crowd-pleasing bake -deeply fudgy, dramatically beautiful, and surprisingly simple to make with just a little planning ahead. The overnight chill transforms a deceptively loose batter into perfectly rollable dough, and the generous powdered sugar coating does all the work of creating those iconic snowy crinkle cracks. Whether you are baking for the holidays, a bake sale, or simply treating yourself to the best homemade chocolate cookie of your life, this recipe never disappoints. Make the dough tonight and bake tomorrow -your future self will thank you.
We’d love to know how this recipe works out for you! Give it a try and leave a comment below to share your experience, tips, or any tweaks you made. Don’t forget to follow us on Pinterest and YouTube for more tasty recipes and kitchen inspiration. Your support and feedback truly mean everything to us!