
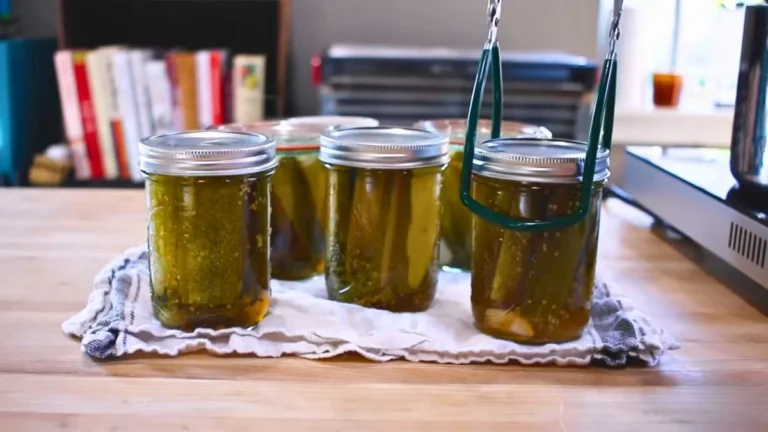

If you have ever bitten into a Vlasic Kosher Dill Pickle and wondered what makes that crunch so impossibly satisfying, this homemade copycat recipe is about to answer every question.
These classic kosher dill pickles are made with fresh pickling cucumbers, a tangy white vinegar brine seasoned with pickling salt, mustard seed, and fragrant dill, then water-bath canned for long-term shelf storage.
The result is a crisp, garlicky, deeply flavored dill pickle that rivals anything you will find at the grocery store. Whether you are a first-time canner or a seasoned home preservationist, this Vlasic-style kosher dill pickle recipe is the one to bookmark, make, and share all summer long.
What Do Vlasic Kosher Dill Pickles Taste Like?
These homemade kosher dill pickles deliver that iconic tangy, garlicky, deeply briny flavor that Vlasic has been famous for since 1942. The white vinegar brine is sharp and clean, cutting through the natural earthiness of the cucumber with a bright acidic punch.
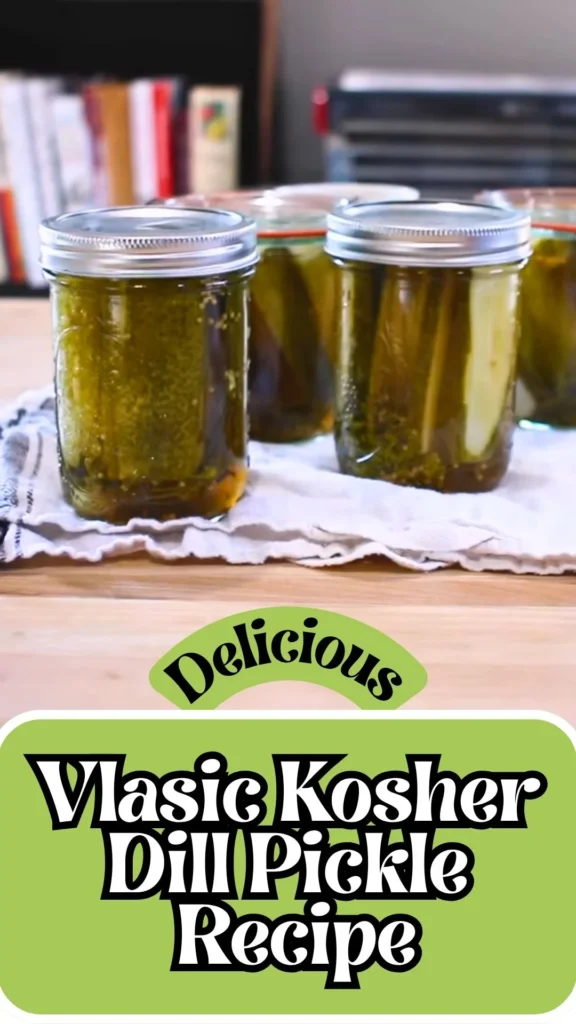
Mustard seed adds a subtle warmth and mild spice, while the fresh dill head brings that unmistakable herbaceous, grassy note that defines a true kosher dill.
The smashed garlic clove infuses every jar with a savory, aromatic depth that builds beautifully over the three-week cure period. And the crunch -firm, snappy, and satisfying -is everything a great pickle should be.
Ingredients & Kitchen Equipment
Ingredients
For the Brine (makes enough for a full batch):
- 4 cups water
- 4 cups white vinegar or cider vinegar (5% acidity)
- Up to ¾ cup sugar (use less or none for a more traditional savory dill pickle)
- ½ cup pure pickling/canning salt (no iodine or anti-caking agents)
- 3 tablespoons pickling spice, optional (tied in a cheesecloth bag)
Per Pint Jar:
- ½ to ¾ lb fresh pickling cucumbers (about 3 lbs total for the full batch), sliced, speared, or left whole
- 1 smashed garlic clove
- ½ teaspoon mustard seed
- 1 bay leaf, grape leaf, or horseradish leaf
- 1 head of fresh dill
- ⅛ teaspoon calcium chloride / Pickle Crisp (optional but strongly recommended for maximum crunch)
Kitchen Equipment
- Large saucepan or pot (for the brine)
- Water-bath canner with rack
- 6–8 clean pint mason jars with new lids and bands
- Jar lifter
- Wide-mouth canning funnel
- Ladle
- Cheesecloth and kitchen twine (if using pickling spice bag)
- Large bowl for ice water soak
- Sharp knife and cutting board
- Clean kitchen towels or paper towels (for wiping jar rims)
- Bubble remover or thin spatula
- Labels and marker
Preparation Time, Cooking Time & Yield
- Prep Time: 30 minutes (plus 30-minute ice water soak)
- Brine Cook Time: 10–15 minutes
- Canning Process Time: 10 minutes
- Total Active Time: Approximately 1 hour
- Cure Time: 3 weeks for best flavor
- Yield: 6–8 pint jars
- Difficulty: Easy to Intermediate
How to Make Vlasic Kosher Dill Pickles – Step by Step
Step 1 -Make the Brine
In a large saucepan, combine the water, white vinegar, sugar, and pickling salt. If using pickling spice, tie it in a cheesecloth bag and add it to the pot. Bring the brine to a gentle simmer over medium heat, stirring until the salt and sugar are fully dissolved. Keep the brine hot over low heat while you prepare the jars and cucumbers -you want it hot when it goes into the jars.
Step 2 -Prep the Cucumbers
Wash the cucumbers thoroughly under cold running water. Trim and discard the blossom end of each cucumber -this is important, as the blossom end contains enzymes that can soften your pickles over time. Slice, spear, or leave whole as desired, then place all the cut cucumbers into a large bowl of ice water. Soak for at least 30 minutes. This ice bath firms the cucumbers from the inside out, giving you that signature crunch in the finished pickle.
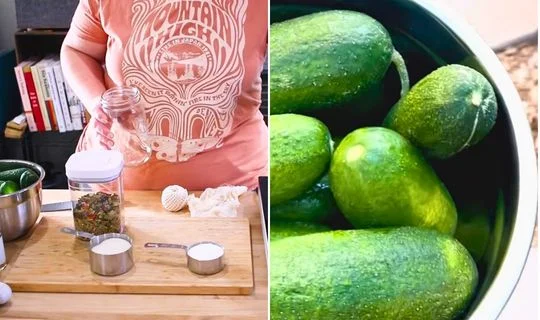
Use only fresh pickling-variety cucumbers (such as Kirby cucumbers). Regular salad cucumbers have thinner skins and higher water content, which produces a soft, mushy pickle -not the satisfying crunch you are going for.
Step 3 -Prepare the Jars
Keep your clean pint mason jars hot (run them through the dishwasher on a hot cycle or keep them in hot water) to prevent thermal shock when the hot brine is added. Into the bottom of each hot jar, place: 1 smashed garlic clove, ½ teaspoon mustard seed, 1 bay leaf (or grape or horseradish leaf), and optionally ⅛ teaspoon calcium chloride. Tuck a fresh dill head into each jar as well.
Step 4 -Pack the Cucumbers (Raw Pack)
Drain the cucumber slices or spears from the ice water and pack them tightly into each jar. Raw packing -loading cucumbers in without pre-cooking them -minimizes the time the cucumbers spend in heat, which is one of the most important secrets to a crisp, firm pickle. Pack as snugly as possible without crushing the cucumbers.
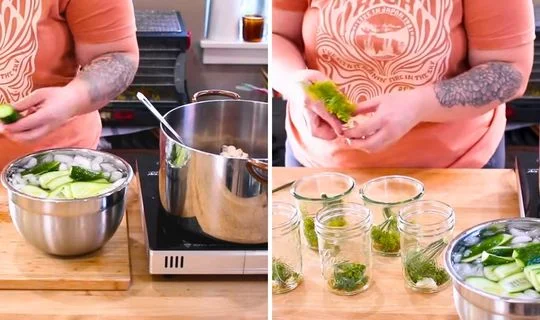
Pack cucumber spears vertically for a cleaner look and a more even brine distribution throughout the jar. For sliced pickles, pack them in layers and press gently to fit as many slices as possible.
Step 5 -Fill with Hot Brine
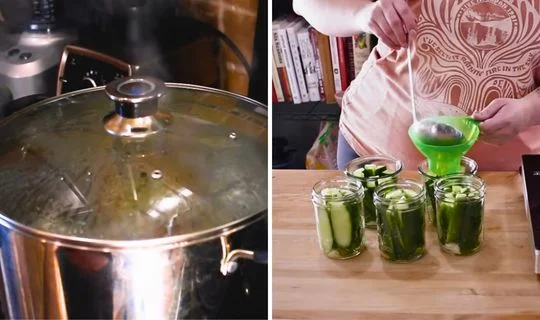
Using a ladle and wide-mouth canning funnel, pour the hot brine over the packed cucumbers in each jar, leaving ½ inch of headspace at the top. Run a bubble remover or thin spatula around the inside edge of each jar to release any trapped air bubbles. Wipe the jar rims clean with a damp cloth or paper towel -any residue on the rim can prevent a proper seal. Apply the new lids and screw the bands on fingertip-tight (just until you feel resistance -do not overtighten).
Step 6 -Water-Bath Process
Place the filled jars onto the rack in your water-bath canner. The water should cover the jars by at least 1 inch. Bring the canner to a full rolling boil, then process for 10 minutes (add 1 extra minute for every 1,000 feet above sea level you are located). Do not start the timer until the water reaches a full rolling boil.
Step 7 -Cool, Seal & Store
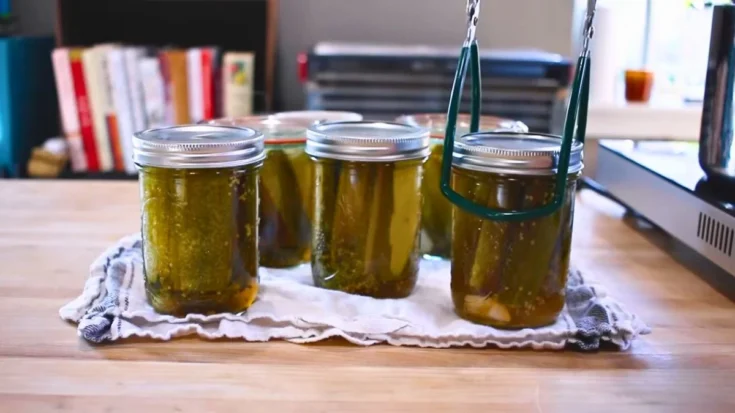
Using a jar lifter, carefully remove the jars from the canner and set them upright on a clean towel or rack. Leave them undisturbed for 12 to 24 hours – do not press the lids or move the jars during this time. After cooling, check that all lids have sealed properly (they should be flat and concave, not flexing up and down). Remove the screw bands, label your jars with the date, and store in a cool, dark place. Any jar that did not seal should go straight into the refrigerator and be used within 2 weeks.
Customization & Serving Ideas for Homemade Dill Pickles
1. Make Spicy Kosher Dill Pickles
Add 1 to 2 dried red chili peppers or ½ teaspoon of red pepper flakes to each jar along with the other aromatics. The heat from the chilies infuses slowly through the cure period, producing a fiery, garlicky dill pickle with a serious kick. This spicy variation is incredible alongside grilled burgers, BBQ sandwiches, and fried chicken.
2. Make Bread and Butter Pickles from the Same Brine
Increase the sugar in the brine to the full ¾ cup measurement and add ½ teaspoon of turmeric and ¼ teaspoon of celery seed per jar. This transforms the same base recipe into a sweet-tangy bread and butter style pickle -a completely different flavor profile from one core recipe.
3. Make Garlic Lover’s Dill Pickles
Double or triple the garlic per jar (2 to 3 smashed cloves instead of 1) for an intensely garlicky kosher dill pickle. You can also add a small piece of fresh horseradish root to each jar alongside the garlic for an extra sharp, assertive bite that pairs beautifully with deli meats and charcuterie boards.
4. Use Cider Vinegar for a Milder, Fruitier Brine
Swapping white vinegar for apple cider vinegar (still at 5% acidity) gives the brine a slightly milder, fruitier acidity with warm undertones. The flavor is a little less sharp and a little more rounded -excellent if you find straight white vinegar pickles too harsh or piercing.
5. Make Refrigerator Pickles for a Quick, No-Canning Option
Skip the water-bath canning process entirely and simply pour the hot brine over the packed jars, let them cool to room temperature, and refrigerate. Refrigerator dill pickles are ready in as little as 48 hours and keep in the fridge for up to 2 months. They will not be shelf-stable, but the crunch is absolutely outstanding since the cucumbers never go through the heat of canning.
6. Serve as a Classic Deli-Style Pickle Plate
Build a deli-inspired platter with this Vlasic Kosher Dill Pickle Recipe, our Sabretts Onion Sauce Recipe, and claussen kosher pickle recipe for a tangy spread packed with bold, savory flavors.
7. Chop Into Pickle Relish for Hot Dogs, Burgers & Potato Salad
Finely chop your finished kosher dill pickles and use them as a homemade dill pickle relish on hot dogs, hamburgers, and bratwurst. Stirred into a classic American potato salad or egg salad, homemade dill relish delivers a bright, punchy freshness that store-bought relish simply cannot match.
Pro Tips for Perfect Homemade Kosher Dill Pickles
1. Always Cut Off the Blossom End of the Cucumber
This single step makes a dramatic difference in pickle texture. The blossom end of the cucumber contains naturally occurring enzymes that break down the cucumber’s cell walls during the pickling process, resulting in soft, mushy pickles. Trimming just ⅛ inch from the blossom end eliminates the enzyme source entirely. The stem end is safe to leave on or trim -only the blossom end is the problem.
2. Use Pickling Salt, Never Table Salt or Iodized Salt
Pickling salt (also called canning salt) is pure sodium chloride with no additives. Table salt contains iodine and anti-caking agents that cloud the brine and can interfere with the fermentation and pickling process, sometimes causing soft or discolored pickles. Kosher salt can be used in a pinch but requires measurement adjustment since the crystal size differs from pickling salt.
3. Do Not Skip the Ice Water Soak
Soaking the cut cucumbers in ice water for a minimum of 30 minutes -and ideally up to 2 hours -before packing them into jars is one of the most effective crunch-preservation techniques available to home canners. The cold water firms the cucumber flesh, reducing the softening effect of the hot brine and processing heat.
4. Add a Tannin-Rich Leaf to Every Jar
Bay leaves, grape leaves, and horseradish leaves all contain natural tannins -plant compounds that inhibit the enzymes responsible for softening pickles during storage. Tuck one leaf into each jar before packing the cucumbers. Grape leaves and horseradish leaves are considered slightly more effective than bay leaves, but all three work meaningfully well.
5. Use Calcium Chloride (Pickle Crisp) for Maximum Crunch
Calcium chloride (sold under the brand name Pickle Crisp by Ball) is a food-safe mineral salt that firms the pectin in cucumber cell walls, dramatically improving the crunch of home-canned pickles. Just ⅛ teaspoon per pint jar is all you need. It is widely available at hardware stores, homebrew shops, and online. This single ingredient is the closest thing to a guarantee of a truly crisp, crunchy pickle.
6. Raw Pack -Never Cook the Cucumbers Before Canning
Raw packing means you load the fresh, uncooked cucumbers directly into the jars and pour the hot brine over them. The alternative -hot packing, where you pre-cook or heat the vegetables before jarring -exposes the cucumbers to additional heat that breaks down their texture. For the crispest possible dill pickle, always raw pack and minimize total heat exposure.
7. Wait the Full Three Weeks Before Opening
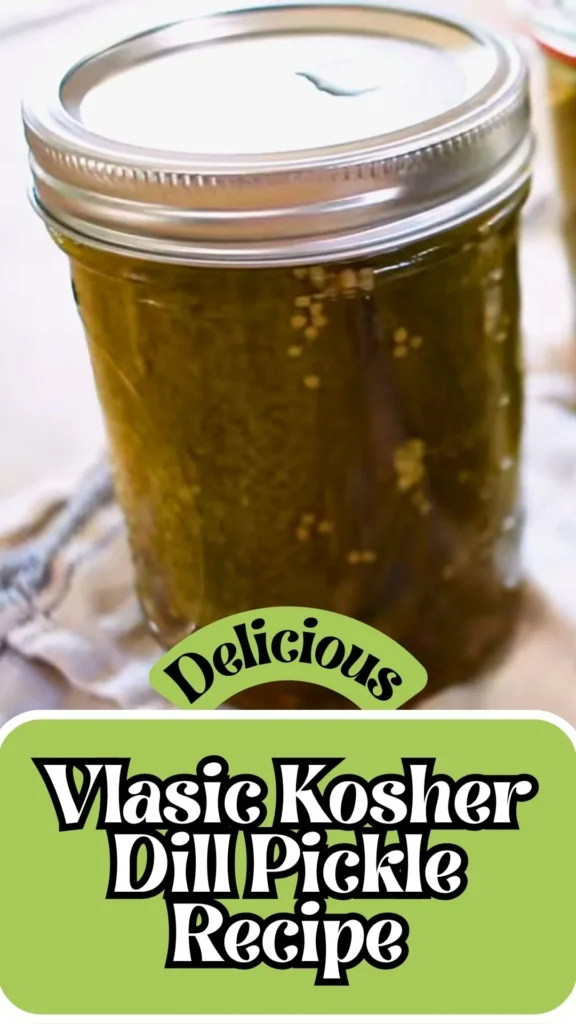
It is genuinely difficult to wait three weeks after canning a beautiful batch of pickles, but the patience pays off enormously. During the cure period, the brine fully penetrates every cucumber slice, the garlic and dill bloom into the liquid, and the flavors meld and deepen in ways that simply are not present in a freshly processed jar. Pickles opened at one week taste sharp and underdeveloped. At three weeks, they taste like Vlasic.
Storage & Reheating Guidance
- Sealed Shelf-Stable Jars: Store in a cool, dark place (pantry or basement) for up to 12–18 months. Best flavor within the first year.
- After Opening: Refrigerate and use within 3 months. Always keep submerged in brine.
- Unsealed Jars: Refrigerate immediately and consume within 2 weeks.
Frequently Asked Questions About Vlasic Kosher Dill Pickles
Here, we’ve got you covered with some common questions that people often ask.
What makes a pickle “kosher dill”?
Despite the name, kosher dill pickles are not necessarily made under formal kosher dietary certification. The term “kosher dill” traditionally refers to the New York Jewish deli style of pickling, which uses a generous amount of garlic in a salt-and-dill brine. The garlic is the defining characteristic -it is what sets a kosher dill apart from a standard dill pickle, which may use little or no garlic at all.
Why are my homemade pickles soft instead of crunchy?
Soft pickles are almost always caused by one or more of the following: not trimming the blossom end, skipping the ice water soak, using cucumbers that are not fresh pickling varieties, overfilling the jars with too much headspace, or processing for too long in the water bath. Applying all six crunch-preserving secrets listed in this recipe gives you the best possible insurance against soft pickles.
Can I make this recipe without canning -just refrigerator pickles?
Absolutely. Skip the water-bath processing step entirely. After filling the jars with hot brine, allow them to cool to room temperature, then cap and refrigerate. Refrigerator kosher dill pickles are ready in 48–72 hours and keep for up to 2 months in the fridge. They will not be shelf-stable, but the texture is often even crunchier than water-bath canned pickles since the cucumbers never go through the processing heat.
What is the difference between white vinegar and cider vinegar for pickling?
White vinegar produces a sharper, cleaner, more assertive brine -the classic Vlasic-style flavor. Apple cider vinegar gives a slightly milder, fruitier acidity with a warmer color. Both must be at 5% acidity for safe canning. Never use homemade vinegar or vinegar with unknown acidity for water-bath canning, as the pH may not be sufficient to safely preserve the product.
Do I need a water-bath canner, or can I use a regular pot?
You can use any large, deep pot with a lid, as long as it is tall enough for the water to cover the jars by at least 1 inch with additional room for a rolling boil. Place a rack, folded kitchen towel, or extra jar lids in the bottom of the pot to keep the jars off direct heat. A proper canning rack makes the process easier and safer, but it is not strictly required.
How long do homemade canned dill pickles last?
Properly processed and sealed jars stored in a cool, dark place will remain safe and high quality for 12 to 18 months. After 18 months, the pickles remain safe to eat if the seal is intact, but texture and flavor quality begin to decline. Always inspect the lid seal, check for any off odors, and discard any jar with a compromised seal or visible mold.
Can I reuse old pickle jars and lids for canning?
You can reuse the glass jars (mason jars) as long as they are free of chips, cracks, or nicks along the rim. However, you should never reuse canning lids (the flat disc with the sealing compound). Lids are designed for one-time use only -the sealing compound compresses during the first canning process and will not create a reliable seal a second time. Always use new lids for each canning session. Screw bands can be reused if they are rust-free and undamaged.
What is Pickle Crisp and where can I buy it?
Pickle Crisp is the brand name for calcium chloride granules sold by Ball specifically for home canning. It is a food-safe mineral salt that strengthens the pectin in cucumber cell walls, resulting in a noticeably crunchier finished pickle. You can find it at most stores that carry canning supplies (Walmart, Target, Ace Hardware, Amazon), as well as homebrew and preserving specialty shops. It is inexpensive, shelf-stable, and one of the most worthwhile additions to your canning pantry.
Vlasic Kosher Dill Pickle Recipe
If you have ever bitten into a Vlasic Kosher Dill Pickle and wondered what makes that crunch so impossibly satisfying, this homemade copycat recipe is about to answer every question.
Ingredients
- 4 cups water
- 4 cups white vinegar or cider vinegar (5% acidity)
- Up to ¾ cup sugar (use less or none for a more traditional savory dill pickle)
- ½ cup pure pickling/canning salt (no iodine or anti-caking agents)
- 3 tablespoons pickling spice, optional (tied in a cheesecloth bag)
- ½ to ¾ lb fresh pickling cucumbers (about 3 lbs total for the full batch), sliced, speared, or left whole
- 1 smashed garlic clove
- ½ teaspoon mustard seed
- 1 bay leaf, grape leaf, or horseradish leaf
- 1 head of fresh dill
- ⅛ teaspoon calcium chloride / Pickle Crisp (optional but strongly recommended for maximum crunch)
Instructions
Step 1 -Make the Brine
In a large saucepan, combine the water, white vinegar, sugar, and pickling salt. If using pickling spice, tie it in a cheesecloth bag and add it to the pot. Bring the brine to a gentle simmer over medium heat, stirring until the salt and sugar are fully dissolved. Keep the brine hot over low heat while you prepare the jars and cucumbers -you want it hot when it goes into the jars.
Step 2 -Prep the Cucumbers
Wash the cucumbers thoroughly under cold running water. Trim and discard the blossom end of each cucumber -this is important, as the blossom end contains enzymes that can soften your pickles over time. Slice, spear, or leave whole as desired, then place all the cut cucumbers into a large bowl of ice water. Soak for at least 30 minutes. This ice bath firms the cucumbers from the inside out, giving you that signature crunch in the finished pickle.
Use only fresh pickling-variety cucumbers (such as Kirby cucumbers). Regular salad cucumbers have thinner skins and higher water content, which produces a soft, mushy pickle -not the satisfying crunch you are going for.
Step 3 -Prepare the Jars
Keep your clean pint mason jars hot (run them through the dishwasher on a hot cycle or keep them in hot water) to prevent thermal shock when the hot brine is added. Into the bottom of each hot jar, place: 1 smashed garlic clove, ½ teaspoon mustard seed, 1 bay leaf (or grape or horseradish leaf), and optionally ⅛ teaspoon calcium chloride. Tuck a fresh dill head into each jar as well.
Step 4 -Pack the Cucumbers (Raw Pack)
Drain the cucumber slices or spears from the ice water and pack them tightly into each jar. Raw packing -loading cucumbers in without pre-cooking them -minimizes the time the cucumbers spend in heat, which is one of the most important secrets to a crisp, firm pickle. Pack as snugly as possible without crushing the cucumbers.
Pack cucumber spears vertically for a cleaner look and a more even brine distribution throughout the jar. For sliced pickles, pack them in layers and press gently to fit as many slices as possible.
Step 5 -Fill with Hot Brine
Using a ladle and wide-mouth canning funnel, pour the hot brine over the packed cucumbers in each jar, leaving ½ inch of headspace at the top. Run a bubble remover or thin spatula around the inside edge of each jar to release any trapped air bubbles. Wipe the jar rims clean with a damp cloth or paper towel -any residue on the rim can prevent a proper seal. Apply the new lids and screw the bands on fingertip-tight (just until you feel resistance -do not overtighten).
Step 6 -Water-Bath Process
Place the filled jars onto the rack in your water-bath canner. The water should cover the jars by at least 1 inch. Bring the canner to a full rolling boil, then process for 10 minutes (add 1 extra minute for every 1,000 feet above sea level you are located). Do not start the timer until the water reaches a full rolling boil.
Step 7 -Cool, Seal & Store
Using a jar lifter, carefully remove the jars from the canner and set them upright on a clean towel or rack. Leave them undisturbed for 12 to 24 hours – do not press the lids or move the jars during this time. After cooling, check that all lids have sealed properly (they should be flat and concave, not flexing up and down). Remove the screw bands, label your jars with the date, and store in a cool, dark place. Any jar that did not seal should go straight into the refrigerator and be used within 2 weeks.
Notes
- Sealed Shelf-Stable Jars: Store in a cool, dark place (pantry or basement) for up to 12–18 months. Best flavor within the first year.
- After Opening: Refrigerate and use within 3 months. Always keep submerged in brine.
- Unsealed Jars: Refrigerate immediately and consume within 2 weeks.
Nutrition Information:
Yield:
8Serving Size:
1Amount Per Serving: Calories: 5
This Vlasic Kosher Dill Pickle recipe brings one of America’s most iconic grocery store flavors right into your own kitchen – with fresher ingredients, customizable heat and sweetness, and that deeply satisfying crunch that only a properly made homemade pickle can deliver. Once you taste your first jar after the full three-week cure, you will never reach for a store-bought pickle the same way again. Make a big batch, share a few jars with friends and family, and enjoy that unmistakable garlicky dill flavor all year long. Happy canning!
We’d love to know how this recipe works out for you! Give it a try and leave a comment below to share your experience, tips, or any tweaks you made. Don’t forget to follow us on Pinterest and YouTube for more tasty recipes and kitchen inspiration. Your support and feedback truly mean everything to us!