
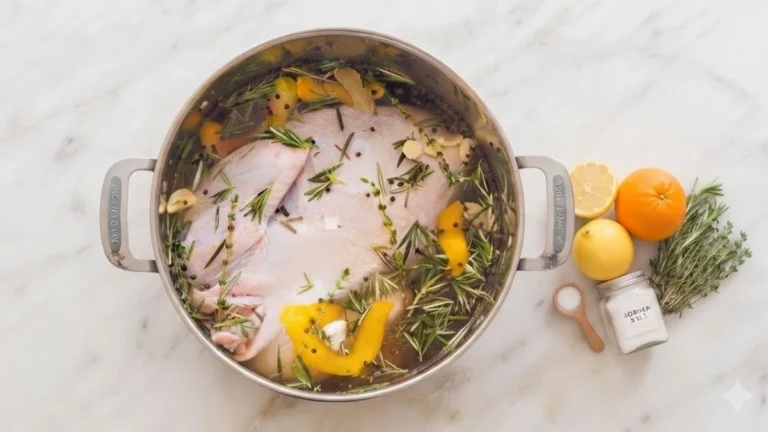

If you have ever wondered how restaurants like Bojangles consistently produce turkey that is impossibly juicy, tender, and packed with flavor, the secret is a well-crafted wet brine.
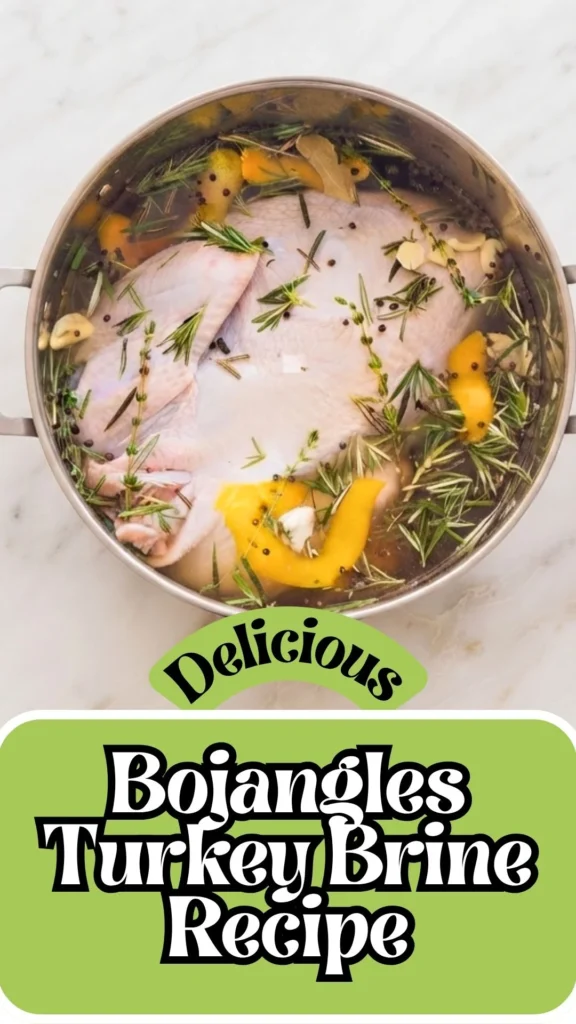
This Bojangles Turkey Brine recipe uses a fragrant, herb-infused salt and brown sugar solution -loaded with fresh rosemary, thyme, smashed garlic, orange peel, and whole black peppercorns -to deeply season your turkey from the inside out before it ever hits the oven.
Whether you are preparing your Thanksgiving centerpiece, a holiday roast, or a weekend family dinner, this overnight turkey brine recipe transforms an ordinary bird into a show-stopping, restaurant-quality meal that everyone at the table will rave about.
What Does a Brined Turkey Taste Like?
Brining transforms a turkey in ways that seasoning alone simply cannot achieve. A turkey soaked in this Bojangles-inspired wet brine emerges from the oven with deeply seasoned, succulent meat that stays moist and tender all the way through -even the notoriously dry white breast meat.
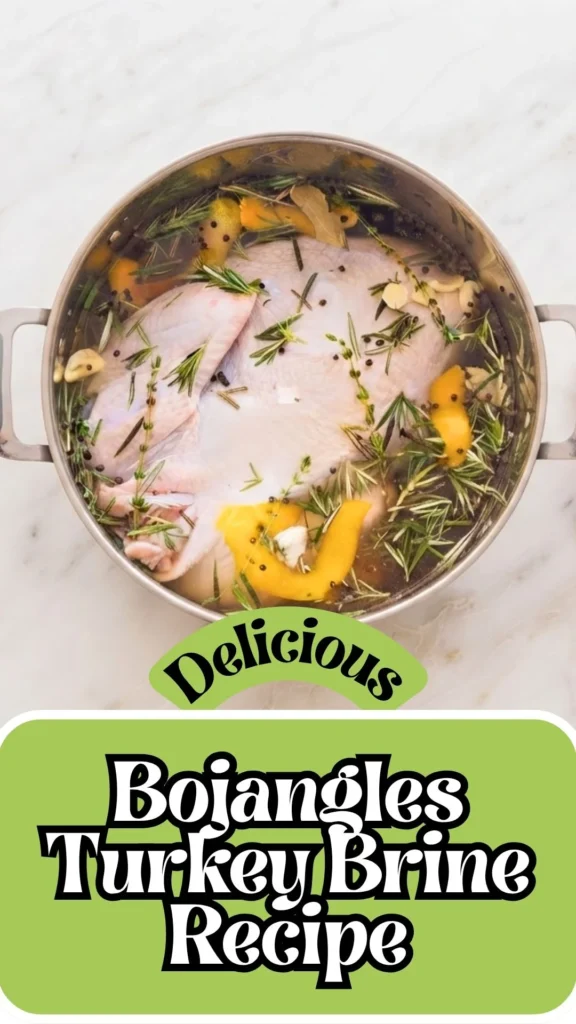
The kosher salt and brown sugar base seasons the turkey from within, while the orange peel adds a subtle citrusy brightness, the rosemary and thyme infuse earthy, aromatic warmth, and the garlic and peppercorns build a savory, well-rounded depth.
The optional apple juice variation adds a gentle natural sweetness that pairs beautifully with the herbal notes, creating a bird with a complex, layered flavor profile that tastes like it came straight from a professional kitchen.
Ingredients & Kitchen Equipment
Ingredients
For the Brine Concentrate:
- 4 cups water (for the initial concentrate)
- 1 cup kosher salt
- ½ cup packed light brown sugar
- Peel from 2 oranges (use a vegetable peeler; wash oranges well, preferably organic)
- 6–9 garlic cloves, peeled and smashed (start with 6)
- 6 sprigs fresh thyme
- 6 sprigs fresh rosemary (leaves stripped from stems)
- 2 bay leaves
- 2 tablespoons whole black peppercorns
To Dilute:
- 12 cups additional cold water
Optional Flavor Boost:
- Replace 3 cups of the diluting water with 3 cups fresh apple juice or apple cider
Kitchen Utensils
- Large heavy-bottomed pot (6–8 quart minimum)
- Wooden spoon or heat-safe stirring spoon
- Vegetable peeler (for orange peel)
- Measuring cups and measuring spoons
- Large brining bag or food-safe container big enough to hold the turkey
- Refrigerator space for a 24-hour brine
- Paper towels (for drying the turkey before roasting)
- Tongs or slotted spoon (for removing turkey from brine)
Preparation Time, Cooking Time & Servings
- Prep Time: 20 minutes
- Brine Time: Up to 24 hours (overnight recommended)
- Total Time: 24 hours 20 minutes
- Yield: Enough brine for 1 whole turkey (12–16 lbs)
- Difficulty: Easy
How to Make Bojangles Turkey Brine
Step 1 – Make the Brine Concentrate
In a large pot, combine the 4 cups of water, kosher salt, and packed light brown sugar. Set the pot over medium-high heat and bring the mixture to a gentle simmer, stirring constantly until the salt and sugar have completely dissolved. This usually takes 3–5 minutes. Do not let it boil aggressively -a calm simmer is all you need to dissolve the solids.
Step 2 – Add the Aromatics
Remove the pot from the heat. Add the orange peels, smashed garlic cloves, fresh thyme sprigs, stripped rosemary leaves, bay leaves, and whole black peppercorns. Stir everything together so the aromatics are fully submerged in the hot brine concentrate. The residual heat will begin drawing out the essential oils and fragrance from the herbs and citrus peel immediately.
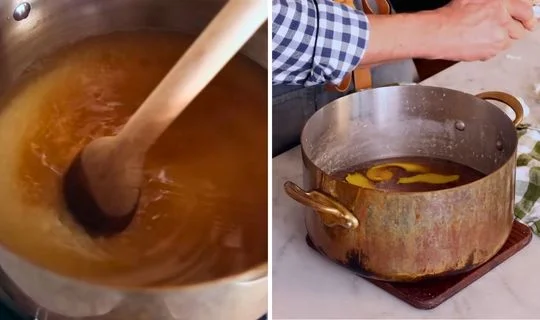
Pro Tip: Use a vegetable peeler to remove the orange peel in wide strips, avoiding as much of the bitter white pith as possible. The zesty outer layer is where all the flavorful citrus oils live.
Step 3 – Dilute the Brine
Stir in the remaining 12 cups of cold water. If you are using the optional apple juice or apple cider variation, replace 3 of those 12 cups with apple juice for a subtly sweet, fruity depth of flavor that pairs especially well with holiday turkey. Stir everything together thoroughly to fully combine the concentrate with the diluting liquid.
Step 4 – Cool the Brine Completely
This is a non-negotiable step. Allow the brine to cool completely to room temperature before it touches the raw turkey. Placing a warm turkey into a warm brine creates an unsafe temperature zone that promotes bacterial growth. To speed up cooling, place the pot in an ice bath or transfer the brine to the refrigerator for 1–2 hours.
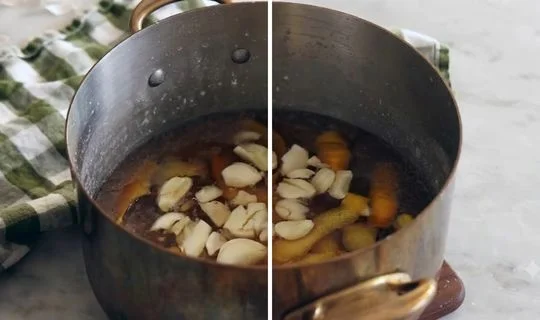
Food Safety Tip: Never pour warm or hot brine directly over a raw turkey. The brine must be completely cold -below 40°F (4°C) -before you begin the brining process.
Step 5 – Brine the Turkey
Place the turkey in a large brining bag or a pot large enough to keep it fully submerged. Pour the completely cooled brine over the turkey, making sure every part of the bird is covered. Seal the bag tightly (removing as much air as possible) or cover the pot with a lid. Refrigerate for up to 24 hours -a minimum of 12 hours is recommended, but overnight delivers the best results.
Step 6 – Remove, Rinse & Pat Dry
When you are ready to cook, remove the turkey from the brine and discard the brine entirely -never reuse it. Rinse the turkey thoroughly under cold running water inside and out, then pat it completely dry with paper towels.
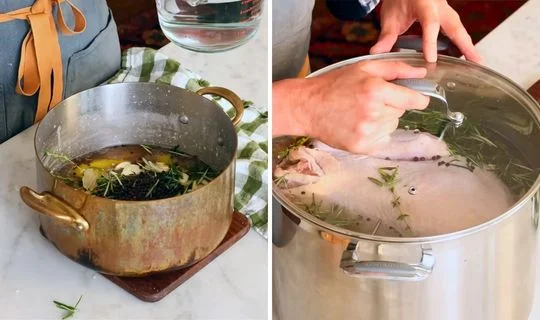
A dry surface is essential for achieving crispy, golden-brown skin during roasting. Proceed with your preferred butter, oil, seasoning rub, and roasting method.
Customization & Serving Ideas for Brined Turkey
1. Add Apple Cider for a Sweet Holiday Twist
Swap 3 cups of the diluting water for fresh apple cider or unfiltered apple juice. The natural sugars in the cider help promote beautiful browning on the turkey skin during roasting, while the apple flavor subtly complements the rosemary and orange peel already in the brine. This variation is particularly popular for Thanksgiving and Christmas turkey recipes.
2. Use Fresh Sage for a Classic Thanksgiving Herb Profile
Replace the thyme sprigs with 6–8 fresh sage leaves for a more traditional Thanksgiving herb flavor. Sage has a bold, earthy, slightly peppery flavor that is deeply associated with holiday poultry and stuffing. Combined with the rosemary and garlic already in this brine, it creates an unmistakably festive aromatic profile.
3. Add Citrus Variety with Lemon and Lime Peel
Supplement the orange peel with strips of lemon and lime peel for a more complex, multi-layered citrus brine. Each citrus fruit contributes a slightly different aromatic quality -orange is sweet and floral, lemon is sharp and bright, lime is tropical and slightly bitter. Together they create a vibrant, zesty brine that makes the turkey pop with freshness.
4. Incorporate Red Pepper Flakes for a Spicy Kick
Add 1–2 teaspoons of red pepper flakes or a sliced jalapeño to the brine concentrate for a subtle heat that penetrates the meat during brining. The spice level is gentle after a 24-hour soak but adds a pleasant warmth that distinguishes this brined turkey from the standard holiday bird. Pairs especially well with the brown sugar and apple cider variation.
5. Use Smoked Salt for a BBQ-Inspired Flavor
Substitute half of the kosher salt with smoked salt to introduce a gentle smoky undertone throughout the turkey meat. This works beautifully if you plan to roast the turkey on a pellet grill or smoker, as it reinforces the natural smoke flavor. It also adds incredible depth when oven-roasted and served alongside smoky sides like roasted sweet potatoes or collard greens.
6. Complete Your Holiday Feast
Serve this Bojangles Turkey Brine Recipe with our olive garden garlic mashed potatoes recipe and Garden Vegetable Rice Recipe for a comforting holiday spread featuring flavorful sides that perfectly complement the juicy, herb-infused turkey.
7. Make a Brine-Based Gravy for Maximum Flavor
Don’t discard the roasting pan drippings from your brined turkey. Deglaze the pan with a splash of chicken broth, whisk in a little flour or cornstarch, and simmer into a deeply flavored gravy. Because the turkey was brined with herbs, garlic, and citrus, the drippings are already packed with seasoning -the resulting gravy requires very little additional seasoning and tastes remarkably rich and restaurant-quality.
Pro Tips for the Perfect Turkey Brine
1. Always Use Kosher Salt, Not Table Salt
Kosher salt is the gold standard for wet brining because its larger, coarser crystals dissolve evenly and season meat more gently than fine table salt. If you substitute table salt, use only half the amount called for, as table salt is significantly denser and saltier by volume. Iodized table salt can also impart a slight metallic taste to the brine that carries into the meat.
2. Never Skip the Cooling Step
Pouring warm brine over a raw turkey is a serious food safety mistake. Warm liquid raises the surface temperature of the meat into the bacterial danger zone (40°F–140°F / 4°C–60°C). Always allow the brine to cool completely to room temperature and ideally chill it in the refrigerator before submerging the turkey. The extra hour of patience protects your family and your dinner.
3. Use a Brining Bag to Save Refrigerator Space
A large turkey in a pot of brine takes up an enormous amount of refrigerator space. A heavy-duty brining bag (or an extra-large zip-lock bag inside a roasting pan) solves this problem by conforming to the shape of the turkey and allowing you to squeeze out excess air. This also means you need less total brine liquid to keep the turkey fully submerged, which saves time and ingredients.
4. Brine for No Longer Than 24 Hours
There is such a thing as over-brining. Leaving the turkey in the brine for more than 24 hours can result in meat that is too salty and a mushy, unpleasant texture as the salt begins to break down the muscle proteins too aggressively. Twelve to twenty-four hours is the sweet spot -enough time for the brine to penetrate deeply and season evenly without overdoing it.
5. Pat the Turkey Completely Dry Before Roasting
Moisture is the enemy of crispy turkey skin. After removing the turkey from the brine, rinse it inside and out and then use generous amounts of paper towels to pat every surface completely dry -including the cavity. For the crispiest skin possible, place the dried turkey uncovered on a rack in the refrigerator for 1–2 hours (or even overnight) after brining and before roasting. This air-drying step makes a remarkable difference.
6. Do Not Salt the Turkey Again After Brining
This is the most common brining mistake home cooks make. The brine has already deeply seasoned the turkey inside and out -adding additional salt to a seasoning rub or butter before roasting will result in an oversalted bird. You can absolutely apply a butter or oil rub with herbs, citrus zest, garlic, or pepper before roasting, but skip any additional salt entirely.

7. Smash the Garlic Cloves Instead of Mincing
Smashed whole garlic cloves release their flavor slowly and gently into the brine over several hours, producing a mellow, sweet garlic infusion rather than an overpowering raw garlic bite. Minced garlic would be too intense and could make the brine taste sharp. A firm press with the flat side of a chef’s knife is all you need to crack the cloves open and activate their aromatics.
Storage & Reheating Guidance
- Brine: Use immediately or refrigerate for up to 24 hours before use. Discard after brining -never reuse brine.
- Brined Turkey (uncooked): Cook within 24 hours of removing from brine.
- Roasted Turkey Leftovers: Store carved turkey in an airtight container in the refrigerator for up to 4 days. Reheat gently in a covered dish with a splash of broth at 325°F to prevent drying out.
Frequently Asked Questions About Bojangles Turkey Brine
Here, we’ve got you covered with some common questions that people often ask.
What makes a wet brine different from a dry brine?
A wet brine fully submerges the turkey in a seasoned saltwater solution, allowing the liquid to penetrate deep into the meat via osmosis. A dry brine applies salt and seasonings directly to the surface of the turkey without any liquid, drawing out moisture and reabsorbing it as a concentrated seasoning layer. Wet brining adds more overall moisture to the bird, while dry brining produces slightly crisper skin. Both methods produce far juicier turkey than no brining at all.
Can I brine a frozen turkey?
You should never brine a still-frozen turkey. The brine cannot penetrate frozen meat, and placing a partially frozen bird in liquid brine creates food safety risks as the outer surface thaws while the interior remains frozen. Always thaw the turkey completely in the refrigerator first -allow approximately 24 hours of thaw time for every 4–5 pounds of turkey -and then begin the brining process.
Can I use this turkey brine recipe for chicken or other poultry?
Absolutely. This brine works beautifully for whole chickens, turkey breasts, cornish hens, and duck. Simply reduce the brining time proportionally -a whole chicken needs only 4–8 hours, a bone-in chicken breast needs 2–4 hours, and a cornish hen needs just 1–2 hours. The same flavor principles apply -the brine will deeply season and tenderize whatever bird you use.
Do I need to rinse the turkey after brining?
Yes, a quick rinse under cold running water is recommended after brining. This removes any surface residue from the brine and any loose herb particles that could burn during roasting. After rinsing, the most important step is to pat the turkey completely and thoroughly dry with paper towels. Skipping the drying step will result in steamed, pale skin rather than the crispy, golden-brown exterior everyone wants.
Can I make the brine ahead of time?
Yes, you can prepare the brine concentrate up to 2 days in advance and store it covered in the refrigerator. When you are ready to brine the turkey, stir in the diluting cold water (or apple cider), confirm it is completely cold, and proceed with brining. Making the brine ahead of time is a great time-saving strategy during busy holiday cooking seasons when every hour of prep time counts.
Why is kosher salt used instead of regular table salt in turkey brine?
Kosher salt has a larger, flakier crystal structure than fine table salt, which means it dissolves more evenly in water and seasons meat more gently and uniformly. It also lacks the iodine additives found in most table salt, which can leave a faintly metallic or chemical taste in brined meat over a long soak. Diamond Crystal and Morton are the two most widely available kosher salt brands -note that they differ significantly in saltiness by volume, so always measure by weight if precision matters.
How much brine do I need for a large turkey?
This recipe produces approximately 16 cups (1 gallon) of brine, which is sufficient for a turkey up to 16 pounds when using a brining bag that keeps the bird fully submerged. For a larger turkey (18–22 lbs), increase the recipe by 50% to ensure the bird is completely covered. The turkey must remain fully submerged for the entire brining period -any exposed sections will not season evenly.
Can I add bourbon or beer to the turkey brine?
Yes, both work wonderfully as partial replacements for some of the diluting water. Bourbon adds a warm, vanilla-and-oak undertone that pairs exceptionally well with the brown sugar and orange peel in this brine. A dark beer like a porter or stout adds malty, roasted depth. Replace no more than 2–3 cups of the diluting water with either spirit to avoid the alcohol overpowering the delicate herb flavors.
Bojangles Turkey Brine Recipe
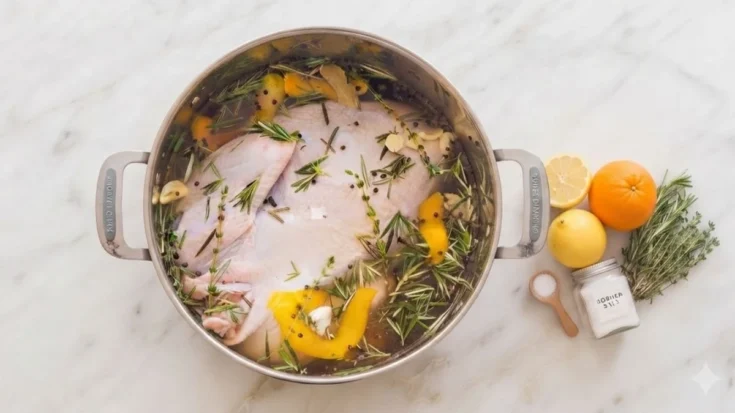
If you have ever wondered how restaurants like Bojangles consistently produce turkey that is impossibly juicy, tender, and packed with flavor, the secret is a well-crafted wet brine.
Ingredients
- 4 cups water (for the initial concentrate)
- 1 cup kosher salt
- ½ cup packed light brown sugar
- Peel from 2 oranges (use a vegetable peeler; wash oranges well, preferably organic)
- 6–9 garlic cloves, peeled and smashed (start with 6)
- 6 sprigs fresh thyme
- 6 sprigs fresh rosemary (leaves stripped from stems)
- 2 bay leaves
- 2 tablespoons whole black peppercorns
- 12 cups additional cold water
- Replace 3 cups of the diluting water with 3 cups fresh apple juice or apple cider
Instructions
Step 1 – Make the Brine Concentrate
In a large pot, combine the 4 cups of water, kosher salt, and packed light brown sugar. Set the pot over medium-high heat and bring the mixture to a gentle simmer, stirring constantly until the salt and sugar have completely dissolved. This usually takes 3–5 minutes. Do not let it boil aggressively -a calm simmer is all you need to dissolve the solids.
Step 2 – Add the Aromatics
Remove the pot from the heat. Add the orange peels, smashed garlic cloves, fresh thyme sprigs, stripped rosemary leaves, bay leaves, and whole black peppercorns. Stir everything together so the aromatics are fully submerged in the hot brine concentrate. The residual heat will begin drawing out the essential oils and fragrance from the herbs and citrus peel immediately.
Step 3 – Dilute the Brine
Stir in the remaining 12 cups of cold water. If you are using the optional apple juice or apple cider variation, replace 3 of those 12 cups with apple juice for a subtly sweet, fruity depth of flavor that pairs especially well with holiday turkey. Stir everything together thoroughly to fully combine the concentrate with the diluting liquid.
Step 4 – Cool the Brine Completely
This is a non-negotiable step. Allow the brine to cool completely to room temperature before it touches the raw turkey. Placing a warm turkey into a warm brine creates an unsafe temperature zone that promotes bacterial growth. To speed up cooling, place the pot in an ice bath or transfer the brine to the refrigerator for 1–2 hours.
Step 5 – Brine the Turkey
Place the turkey in a large brining bag or a pot large enough to keep it fully submerged. Pour the completely cooled brine over the turkey, making sure every part of the bird is covered. Seal the bag tightly (removing as much air as possible) or cover the pot with a lid. Refrigerate for up to 24 hours -a minimum of 12 hours is recommended, but overnight delivers the best results.
Step 6 – Remove, Rinse & Pat Dry
When you are ready to cook, remove the turkey from the brine and discard the brine entirely -never reuse it. Rinse the turkey thoroughly under cold running water inside and out, then pat it completely dry with paper towels. A dry surface is essential for achieving crispy, golden-brown skin during roasting. Proceed with your preferred butter, oil, seasoning rub, and roasting method.
Nutrition Information:
Yield:
12Serving Size:
1Amount Per Serving: Calories: 712
This Bojangles Turkey Brine recipe is the single most impactful thing you can do to guarantee a juicy, flavorful, and show-stopping turkey -whether for Thanksgiving, Christmas, or any special occasion roast. The fragrant combination of kosher salt, brown sugar, orange peel, fresh rosemary, thyme, and smashed garlic works together to season the turkey deeply and lock in moisture that ordinary roasting simply cannot achieve. Plan ahead, brine overnight, pat dry, and roast to golden perfection. Once you brine your turkey this way, you will never go back to an unbrined bird again. Happy cooking!
We’d love to know how this recipe works out for you! Give it a try and leave a comment below to share your experience, tips, or any tweaks you made. Don’t forget to follow us on Pinterest and YouTube for more tasty recipes and kitchen inspiration. Your support and feedback truly mean everything to us!