
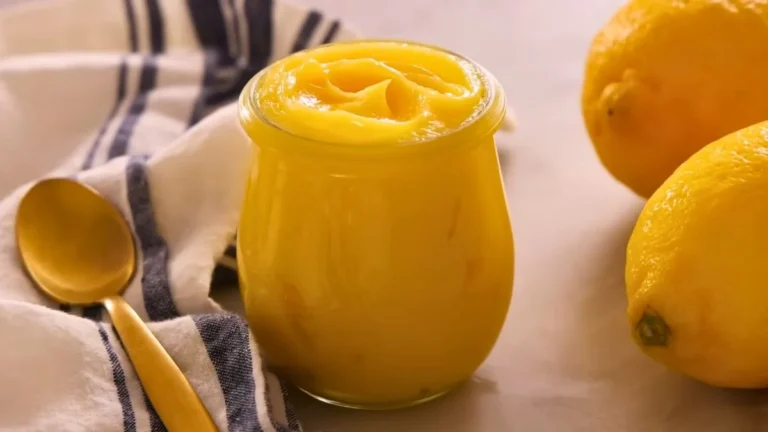

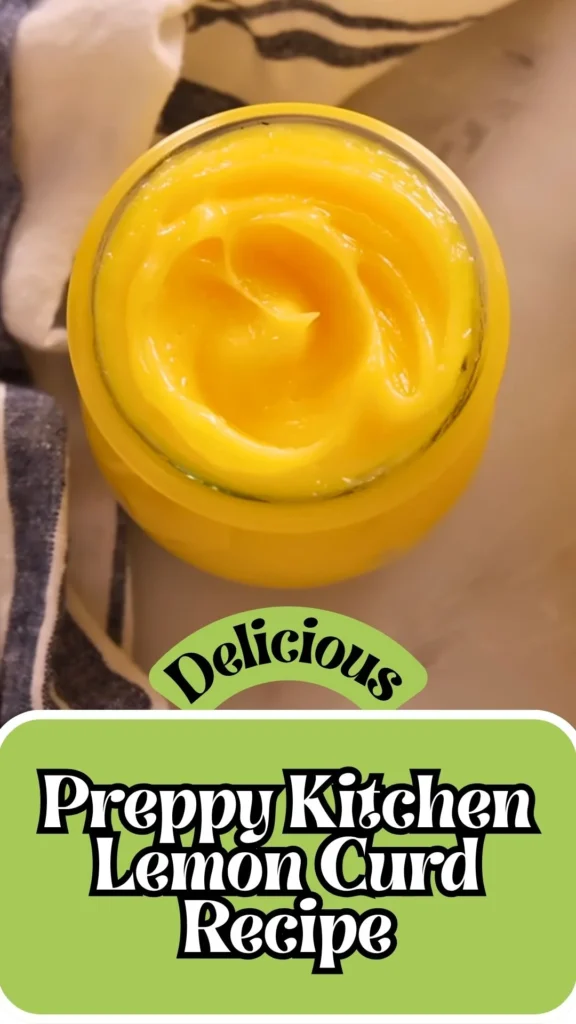
If you have ever tasted a spoonful of silky, tangy, buttery lemon curd and wondered how something so luxurious could be made at home, this Preppy Kitchen Lemon Curd recipe by John Kanell is about to change everything.
Made with just five simple ingredients -fresh lemon zest, lemon juice, egg yolks, sugar, and cold butter -this easy homemade lemon curd comes together in about 25 minutes of active cooking time and sets into the most velvety, intensely citrusy spread you have ever tasted.
Whether you are filling a lemon tart, layering a lemon cake, swirling into buttercream, or simply spooning it over scones with clotted cream, this foolproof lemon curd recipe delivers bakery-quality results every single time.
What Does Homemade Lemon Curd Taste Like?
Fresh homemade lemon curd is a revelation compared to anything from a jar. The flavor is vibrantly bright and intensely citrusy – a perfect balance of tart lemon acidity and mellow sweetness, with a rich, buttery finish that lingers beautifully on the palate.
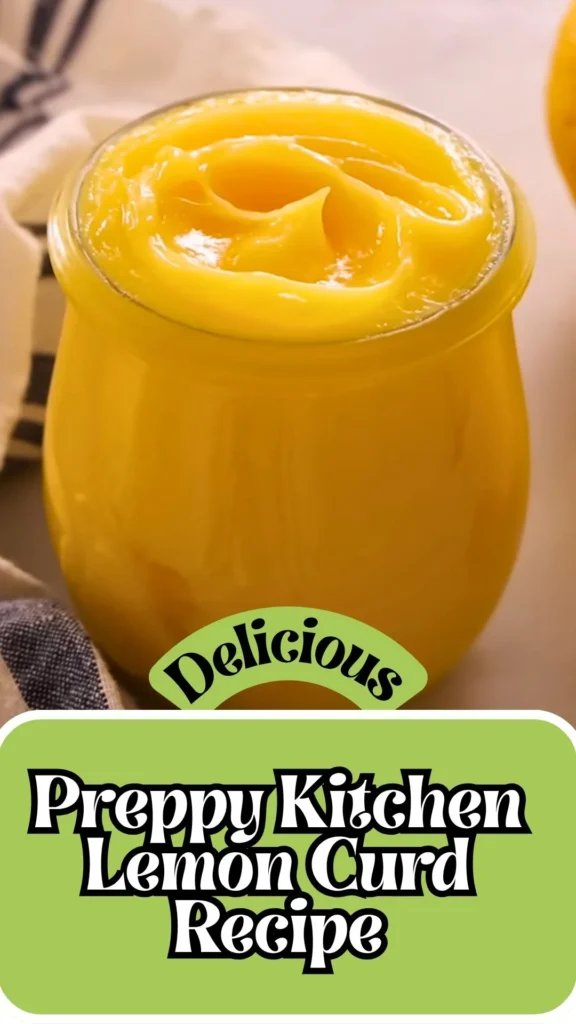
The texture is where homemade truly shines: thick, smooth, and velvety in a way that coats the back of a spoon like liquid silk.
The lemon zest contributes floral, aromatic top notes from the essential oils in the peel, while the egg yolks give the curd its signature golden color and a gentle richness that rounds out the tartness without ever making it feel heavy or cloying.
Ingredients & Kitchen Equipment
Ingredients
- Granulated sugar -1 cup (200 g)
- Fresh lemon zest -2 tablespoons (from about 2 lemons)
- Large egg yolks -6
- Fresh lemon juice -7 tablespoons / 100 ml (from about 2–3 lemons)
- Cold unsalted butter -½ cup / 113 g, cubed small
Kitchen Utensils
- Zester or microplane grater
- Citrus juicer or reamer
- Fine-mesh sieve or strainer
- Food processor (optional, for lemon sugar method)
- Medium heavy-bottomed saucepan or pot
- Whisk
- Wooden spoon or silicone spatula
- Small mixing bowl
- Airtight glass jar or container (for storage)
- Plastic wrap (to press directly on surface)
Preparation Time, Cooking Time & Yield
- Prep Time: 15 minutes
- Cook Time: approximately 10 minutes
- Cooling Time: approximately 2 hours
- Total Active Time: 25 minutes
- Yield: about 1½ cups (approximately 360 ml)
- Difficulty: Easy
How to Make Preppy Kitchen Lemon Curd – Step-by-Step Instructions
Step 1 -Zest the Lemons
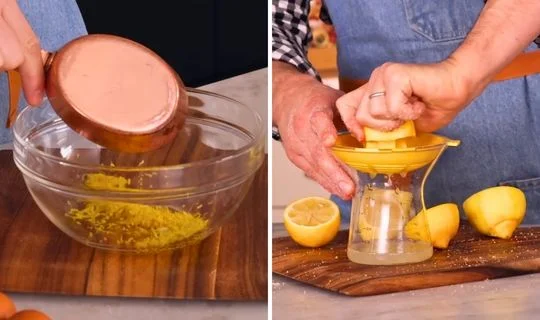
Wash the lemons thoroughly under warm water to remove any wax or residue from the skin. Using a microplane zester or the fine side of a box grater, zest 2 lemons to yield approximately 2 tablespoons of lemon zest. Work carefully -you only want the bright yellow outer layer, not the bitter white pith beneath it. Most of the lemon’s intense flavor lives in the essential oils of the peel, so this step is critical for a deeply aromatic curd.
Step 2 -Make the Lemon Sugar
Combine the lemon zest with the granulated sugar using one of two methods. Food processor method: pulse the zest and sugar together for about 30 seconds until the mixture resembles wet sand and turns a pale lemon yellow. By-hand method: add both to a bowl and rub the zest into the sugar firmly with clean fingertips for 1–2 minutes until the sugar feels damp and smells intensely of fresh lemon. Either method works beautifully -the goal is to release the essential oils from the zest into the sugar, amplifying the lemon flavor throughout the entire curd.
Step 3 -Juice the Lemons
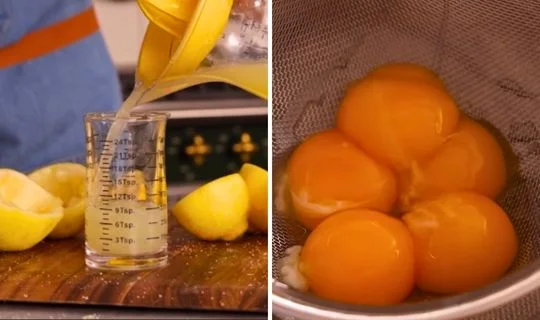
Roll the zested lemons firmly on the counter with your palm to break down the inner membranes and maximize juice yield. Cut and squeeze to get 7 tablespoons (100 ml) of fresh lemon juice, straining out all seeds. Set aside. Always use freshly squeezed lemon juice for lemon curd -bottled juice lacks the brightness and complexity that makes this recipe exceptional.
Step 4 -Prepare the Egg Yolks
Separate 6 large egg yolks from the whites (reserve the whites for meringue, pavlova, or an omelet). Strain the yolks through a fine-mesh sieve into your medium saucepan -this removes the chalazae (the white twisting strands attached to the yolk) and ensures a perfectly smooth final curd. Lightly whisk the yolks to break them up.
Step 5 -Combine the Ingredients
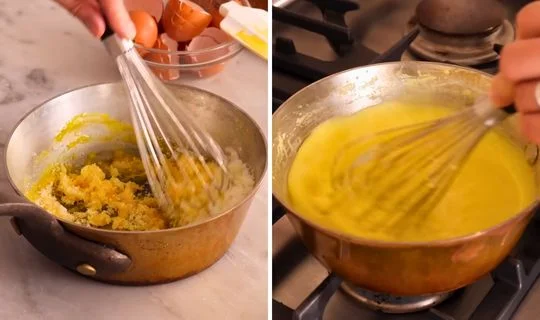
Add the lemon sugar to the strained yolks in the saucepan and whisk together until the mixture lightens in color to a pale pastel yellow. Gradually pour in the fresh lemon juice, whisking as you go. If any yolk remains in your strainer, you can pour the first splash of lemon juice through it to recover every last bit.
Step 6 -Cook the Lemon Curd
Place the saucepan over low heat. Whisk constantly and continuously -do not walk away. Cook the curd until it thickens, just begins to show tiny bubbles around the edges, and coats the back of a wooden spoon clearly enough that a finger drawn across leaves a clean, distinct trail. This typically takes 8–12 minutes depending on your stove. Watch the texture, not the clock. Never let the curd reach a rolling boil, as this will scramble the egg yolks and ruin the smooth texture.
If you see the mixture beginning to steam heavily or small curds forming around the edges, immediately remove the pan from heat and whisk vigorously to bring the temperature down before returning it to the burner.
Step 7 -Finish with Cold Butter
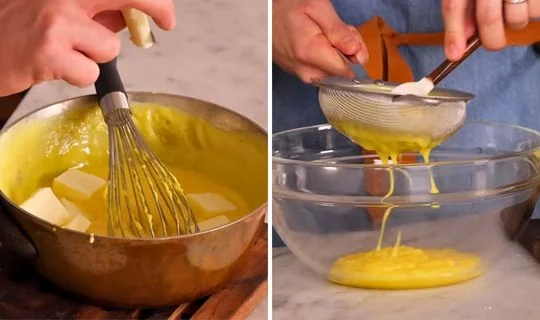
Remove the saucepan from the heat. Add the cold cubed unsalted butter all at once and stir continuously until every piece is fully melted and incorporated into the curd. The mixture will loosen slightly as the cold butter goes in -this is completely normal. As the curd cools, it will thicken back into that gorgeous, velvety texture.
Step 8 -Optional Strain for Silky Smooth Curd
For the smoothest, most professional finish, pour the warm curd through a fine-mesh sieve into a clean bowl, pressing gently with a spatula. This removes any stray bits of cooked egg yolk and the zest fibers, leaving behind a perfectly silky, glass-smooth lemon curd.
Step 9 -Cool and Store
Transfer the curd to a shallow bowl or pie tin – the wider surface area allows it to cool faster and more evenly. If you plan to use it within a few hours, press a sheet of plastic wrap directly onto the surface of the curd to prevent a skin from forming. Allow to cool at room temperature for about 30 minutes, then refrigerate until fully set and chilled, approximately 1–2 hours total. The finished curd will be thick, velvety, and spoonable straight from the jar.
Customization & Serving Ideas for Homemade Lemon Curd
1. Spread It on Scones with Clotted Cream
Serve this Preppy Kitchen Lemon Curd Recipe with our pancake mix scones recipe and almond horn recipe for an elegant afternoon treat featuring bright citrus flavor, buttery textures, and delightful almond notes.
2. Use It as a Lemon Tart or Lemon Bar Filling
Pour the freshly made, still-warm lemon curd directly into a pre-baked shortcrust pastry shell and let it set in the refrigerator for a show-stopping lemon tart. Alternatively, spread it over a shortbread base and top with meringue for homemade lemon bars that taste infinitely better than any boxed mix version.
3. Swirl Into Lemon Buttercream for Cakes
Fold 2–3 tablespoons of lemon curd into a batch of vanilla or lemon buttercream frosting to create a fruity, tangy lemon curd buttercream. This is particularly stunning layered between vanilla sponge cake tiers or spread over a classic Victoria sponge. The curd adds a punch of real lemon flavor that extract alone simply cannot replicate.
4. Layer Inside Lemon Rolls or Sweet Buns
Spread lemon curd generously over laminated dough before rolling it up to create lemon curd sweet rolls -a brilliant citrusy alternative to cinnamon rolls. The curd caramelizes slightly during baking and creates a jammy, intensely lemony spiral center that is completely addictive.
5. Dollop Over Pavlova or Meringue Nests
Spoon lemon curd generously over a crisp, cloud-white pavlova base topped with whipped cream and fresh berries for a stunning dessert. The glossy, golden curd contrasts beautifully against the white meringue and provides the tart citrus punch that balances the sweetness of the meringue and cream.
6. Mix Into Yogurt or Overnight Oats
Stir a spoonful of homemade lemon curd into plain Greek yogurt, overnight oats, or chia pudding for an effortless, flavor-packed breakfast. It dissolves beautifully into creamy textures and turns an ordinary morning bowl into something that feels genuinely special -no granola bar could compete.
7. Fill Linzer Cookies, Macarons, or Thumbprint Cookies
Use lemon curd as a sophisticated filling for sandwich-style cookies. It works especially beautifully in classic linzer cookies (the tart curd visible through the cut-out window), French macarons, or simple thumbprint cookies pressed with a well and filled generously with a gleaming dollop of golden curd.
Pro Tips for Perfect Homemade Lemon Curd Every Time
1. Always Use Fresh Lemon Juice – Never Bottled
This is non-negotiable in lemon curd. Bottled lemon juice is pasteurized and preservative-treated, which strips away the volatile aromatic compounds that give fresh lemon its vivid, floral brightness. Fresh juice from real lemons -combined with the zest -is what makes homemade lemon curd taste extraordinary rather than ordinary. Even the difference between store-bought lemon curd and this recipe comes down largely to fresh juice.
2. Low Heat Is Your Best Friend
The most common mistake in making lemon curd is using heat that is too high. Egg yolks begin to scramble at around 160°F (71°C), and a rolling boil will push the temperature well beyond that. Keep the heat consistently low and gentle throughout the entire cooking process. Patient, low-and-slow cooking is the secret to a lemon curd that is perfectly smooth and silky rather than lumpy and curdled.
3. Whisk Constantly and Never Walk Away
Once the pot goes on the heat, commit to it fully. Constant whisking achieves two things: it keeps the egg proteins moving so they heat evenly without scrambling, and it incorporates air for a lighter texture. Even a 30-second distraction can allow the bottom of the pan to overheat and scramble the eggs. Treat this like a 10-minute meditation -focus, whisk, and watch.
4. Don’t Skip the Lemon Sugar Step
Rubbing or processing the lemon zest into the sugar before adding it to the yolks is a technique rooted in sound flavor science. The mechanical action ruptures the oil glands in the zest cells, releasing the essential oils directly into the sugar crystals. The result is a lemon sugar that is dramatically more aromatic and flavorful than simply adding zest at the end. This single step elevates the entire recipe.
5. Strain Twice for the Smoothest Result
For an ultra-professional, restaurant-worthy texture, strain the curd twice -once through a fine-mesh sieve when the yolks go in, and again after cooking to remove any cooked egg bits or zest fibers. The result is a lemon curd so smooth and glossy it almost looks like a mirror glaze. If you are using the curd as a cake filling or tart base where texture is visible, this double-strain makes a noticeable difference.
6. Use Cold Butter Cut Into Small Cubes
Cold butter, not room-temperature butter, is what gives lemon curd its final velvety texture and glossy sheen. Small cubes melt gradually in the residual heat of the curd, creating a stable, emulsified sauce. Room-temperature butter melts too quickly and unevenly, which can affect both the texture and the finished consistency once the curd sets.

7. Store with Plastic Wrap Pressed Directly on the Surface
Lemon curd develops a tough, leathery skin as it cools and oxidizes when exposed to air. Prevent this entirely by pressing a sheet of plastic wrap flush against the entire surface of the warm curd before refrigerating. This creates an airtight seal and keeps the curd smooth, moist, and skin-free from the moment it cools to the moment you open the jar.
Storage & Reheating Guidance
- Refrigerator: Store in a sealed airtight jar or container for up to 1 week. Press plastic wrap directly on the surface before sealing to prevent a skin from forming.
- Freezer: Freeze in an airtight container for up to 2 months. Thaw overnight in the refrigerator. Do not microwave from frozen.
- To use from cold: Lemon curd is ready to use straight from the refrigerator -no reheating needed. If a slightly looser consistency is desired, let it sit at room temperature for 15–20 minutes before using.
Frequently Asked Questions About Homemade Lemon Curd
Here, we’ve got you covered with some common questions that people often ask.
Why did my lemon curd turn out lumpy or scrambled?
Lumpy lemon curd is caused by heat that is too high or insufficient stirring. The egg yolks begin to set and scramble when the temperature rises too fast. If this happens, immediately strain the curd through a fine-mesh sieve -you may be able to rescue it if only a small portion has scrambled. Going forward, keep the heat on low and whisk without stopping throughout the entire cooking time.
Why is my lemon curd not thickening?
If your lemon curd is not thickening after 10–12 minutes on low heat, your heat may be too low or the ratio of yolks to liquid may be slightly off. Increase the heat very slightly (still far below a boil) and continue whisking. The curd will also continue to thicken significantly as it cools in the refrigerator -what looks loose and thin when hot will set into a proper, spoonable consistency once fully chilled.
Can I use whole eggs instead of just egg yolks?
Egg yolks only are strongly recommended for the richest, most stable lemon curd. Whole eggs include the whites, which contain different proteins that can produce a slightly rubbery or grainy texture in curd. Yolks contribute fat-soluble flavor compounds, a richer golden color, and a smoother emulsification. If you must use whole eggs, use 3 whole eggs in place of 6 yolks, but expect a slightly lighter texture and less vibrant color.
Why does my lemon curd look orange instead of yellow?
The color of lemon curd is entirely determined by the yolks used. Eggs from pasture-raised hens or hens fed a carotenoid-rich diet produce deep orange yolks, which naturally result in a more orange-toned curd. This is perfectly normal and has zero effect on the flavor. If a brighter yellow color is important to you, use standard supermarket eggs with lighter yolks.
Can I make lemon curd without a food processor?
Absolutely. The by-hand method of rubbing the lemon zest into the sugar with your fingertips is just as effective as a food processor -it just takes slightly more effort and about 1–2 minutes of firm rubbing. The warmth of your hands actually helps release the oils from the zest cells effectively. Many professional pastry chefs prefer the by-hand method for better tactile control over the texture of the lemon sugar.
How do I know when lemon curd is done cooking?
Lemon curd is ready when it coats the back of a wooden spoon thickly enough that a finger drawn across leaves a clear, distinct trail that holds its shape. It should also show tiny, lazy bubbles just beginning to appear around the very edges of the pan -not a full boil, just the first signs of bubbling. If you have an instant-read thermometer, the curd should read between 170–175°F (77–79°C).
Can I make lemon curd ahead of time?
Yes, and it is actually better made ahead! Freshly made lemon curd needs at least 1–2 hours to fully set and develop its final texture and flavor. Making it 1–3 days in advance allows the flavors to meld and deepen. Store it in a sealed jar in the refrigerator and it will be ready and waiting whenever you need it -perfect for prepping ahead of a dinner party, holiday baking, or a big batch of pastries.
Can I double this lemon curd recipe?
Yes. This recipe doubles well. Use a larger, wider saucepan to ensure the increased volume cooks evenly, and expect a slightly longer cook time -typically 3–5 additional minutes. Stir even more diligently with the larger batch, as the greater volume means the bottom of the pan can heat unevenly if left unstirred.
Preppy Kitchen Lemon Curd Recipe
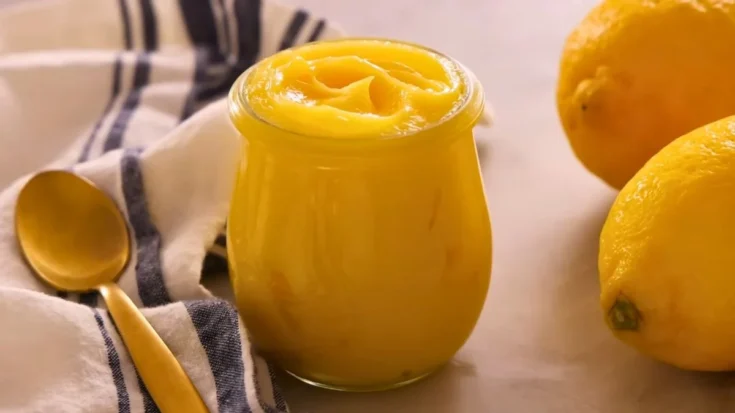
If you have ever tasted a spoonful of silky, tangy, buttery lemon curd and wondered how something so luxurious could be made at home, this Preppy Kitchen Lemon Curd recipe by John Kanell is about to change everything.
Ingredients
- Granulated sugar -1 cup (200 g)
- Fresh lemon zest -2 tablespoons (from about 2 lemons)
- Large egg yolks -6
- Fresh lemon juice -7 tablespoons / 100 ml (from about 2–3 lemons)
- Cold unsalted butter -½ cup / 113 g, cubed small
Instructions
Step 1 -Zest the Lemons
Wash the lemons thoroughly under warm water to remove any wax or residue from the skin. Using a microplane zester or the fine side of a box grater, zest 2 lemons to yield approximately 2 tablespoons of lemon zest. Work carefully -you only want the bright yellow outer layer, not the bitter white pith beneath it. Most of the lemon’s intense flavor lives in the essential oils of the peel, so this step is critical for a deeply aromatic curd.
Step 2 -Make the Lemon Sugar
Combine the lemon zest with the granulated sugar using one of two methods. Food processor method: pulse the zest and sugar together for about 30 seconds until the mixture resembles wet sand and turns a pale lemon yellow. By-hand method: add both to a bowl and rub the zest into the sugar firmly with clean fingertips for 1–2 minutes until the sugar feels damp and smells intensely of fresh lemon. Either method works beautifully -the goal is to release the essential oils from the zest into the sugar, amplifying the lemon flavor throughout the entire curd.
Step 3 -Juice the Lemons
Roll the zested lemons firmly on the counter with your palm to break down the inner membranes and maximize juice yield. Cut and squeeze to get 7 tablespoons (100 ml) of fresh lemon juice, straining out all seeds. Set aside. Always use freshly squeezed lemon juice for lemon curd -bottled juice lacks the brightness and complexity that makes this recipe exceptional.
Step 4 -Prepare the Egg Yolks
Separate 6 large egg yolks from the whites (reserve the whites for meringue, pavlova, or an omelet). Strain the yolks through a fine-mesh sieve into your medium saucepan -this removes the chalazae (the white twisting strands attached to the yolk) and ensures a perfectly smooth final curd. Lightly whisk the yolks to break them up.
Step 5 -Combine the Ingredients
Add the lemon sugar to the strained yolks in the saucepan and whisk together until the mixture lightens in color to a pale pastel yellow. Gradually pour in the fresh lemon juice, whisking as you go. If any yolk remains in your strainer, you can pour the first splash of lemon juice through it to recover every last bit.
Step 6 -Cook the Lemon Curd
Place the saucepan over low heat. Whisk constantly and continuously -do not walk away. Cook the curd until it thickens, just begins to show tiny bubbles around the edges, and coats the back of a wooden spoon clearly enough that a finger drawn across leaves a clean, distinct trail. This typically takes 8–12 minutes depending on your stove. Watch the texture, not the clock. Never let the curd reach a rolling boil, as this will scramble the egg yolks and ruin the smooth texture.
If you see the mixture beginning to steam heavily or small curds forming around the edges, immediately remove the pan from heat and whisk vigorously to bring the temperature down before returning it to the burner.
Step 7 -Finish with Cold Butter
Remove the saucepan from the heat. Add the cold cubed unsalted butter all at once and stir continuously until every piece is fully melted and incorporated into the curd. The mixture will loosen slightly as the cold butter goes in -this is completely normal. As the curd cools, it will thicken back into that gorgeous, velvety texture.
Step 8 -Optional Strain for Silky Smooth Curd
For the smoothest, most professional finish, pour the warm curd through a fine-mesh sieve into a clean bowl, pressing gently with a spatula. This removes any stray bits of cooked egg yolk and the zest fibers, leaving behind a perfectly silky, glass-smooth lemon curd.
Step 9 -Cool and Store
Transfer the curd to a shallow bowl or pie tin – the wider surface area allows it to cool faster and more evenly. If you plan to use it within a few hours, press a sheet of plastic wrap directly onto the surface of the curd to prevent a skin from forming. Allow to cool at room temperature for about 30 minutes, then refrigerate until fully set and chilled, approximately 1–2 hours total. The finished curd will be thick, velvety, and spoonable straight from the jar.
Notes
Refrigerator: Store in a sealed airtight jar or container for up to 1 week. Press plastic wrap directly on the surface before sealing to prevent a skin from forming.
Freezer: Freeze in an airtight container for up to 2 months. Thaw overnight in the refrigerator. Do not microwave from frozen.
To use from cold: Lemon curd is ready to use straight from the refrigerator -no reheating needed. If a slightly looser consistency is desired, let it sit at room temperature for 15–20 minutes before using.
Nutrition Information:
Yield:
1Serving Size:
1Amount Per Serving: Calories: 459
This Preppy Kitchen Lemon Curd recipe by John Kanell is proof that the most extraordinary things in baking often come from the simplest ingredients. Just five pantry staples -lemons, sugar, egg yolks, and butter -transform in about 25 minutes into a velvety, golden, intensely citrusy curd that elevates everything it touches. From lemon tarts and layer cakes to morning scones and thumbprint cookies, a jar of this homemade lemon curd in your refrigerator opens up an entire world of baking possibilities. Make a batch this week and discover why so many home bakers keep it on permanent rotation.
We’d love to know how this recipe works out for you! Give it a try and leave a comment below to share your experience, tips, or any tweaks you made. Don’t forget to follow us on Pinterest and YouTube for more tasty recipes and kitchen inspiration. Your support and feedback truly mean everything to us!