
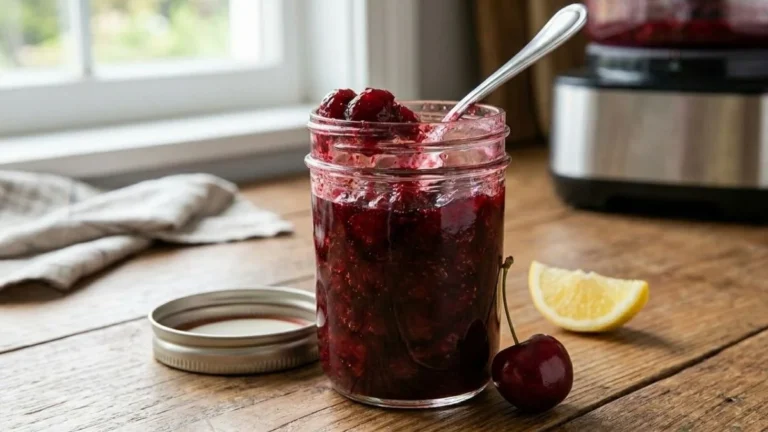

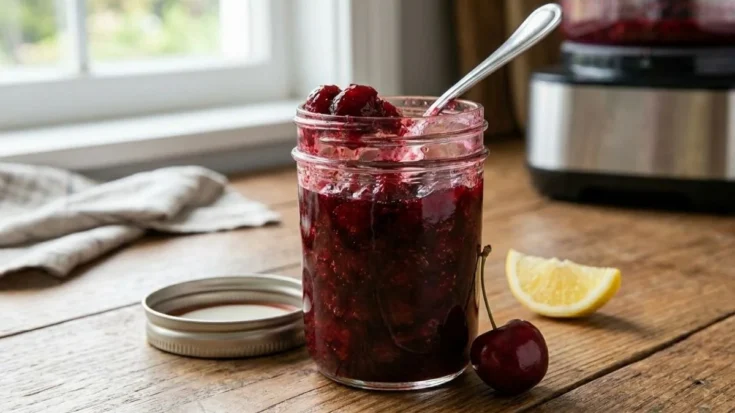
If you’ve ever bitten into a spoonful of glossy, ruby-red cherry jam bursting with summer sweetness, you already know why homemade always beats store-bought.
This Ball Cherry Jam Recipe is a classic small-batch preserve made with fresh cherries, pectin, lemon juice, and just enough sugar to let the fruit shine. Whether you’re a seasoned home canner or trying your first hot water bath canning project, this reduced-sugar cherry jam delivers big flavor with a foolproof process.
Made using a jam maker for convenience, it’s the perfect way to capture peak-season cherries in a jar -all year long.
What Does Ball Cherry Jam Taste Like?
This homemade cherry jam is bold, fruity, and naturally sweet with a gentle tartness from the bottled lemon juice.
Unlike overly sugary commercial jams, this reduced-sugar recipe lets the deep, rich flavor of fresh cherries take center stage. The texture is thick and spreadable -somewhere between a rustic crushed preserve and a silky smooth jam -depending on how finely you mash your cherries.
Every spoonful feels like a concentrated bite of summer, making it irresistible on toast, scones, or straight from the jar.
Ingredients & Kitchen Utensils
Ingredients
| Ingredient | Quantity |
|---|---|
| Fresh Cherries | Enough to yield desired amount (mashed/chopped) |
| Pectin (reduced-sugar) | 3 tablespoons |
| Bottled Lemon Juice | 2 tablespoons |
| Unsalted Butter | ½ teaspoon |
| Granulated Sugar | 2 cups |
Kitchen Utensils & Equipment
- Ball jam maker (or similar automatic jam maker)
- 8 oz Ball canning jars with lids and bands
- Hot water bath canner with rack
- Cherry pitter
- Potato masher
- Jar lifter
- Canning funnel
- Clean kitchen towels or paper towels
- Ladle
Preparation & Cooking Time
| Prep Time | 20 minutes |
| Jam Maker Cycle | 21 minutes |
| Water Bath Processing | 10 minutes |
| Cooling Time | 24 hours |
| Total Active Time | ~50 minutes |
| Yield | Approximately 3–4 half-pint (8 oz) jars |
How to Make Ball Cherry Jam -Step-by-Step Instructions
Step 1 -Sterilize Your Canning Equipment
Before anything touches your jam, wash all 8 oz canning jars, lids, and bands thoroughly with hot soapy water. Sterilize them in boiling water or run them through a hot dishwasher cycle. Keep them hot until ready to fill –cold jars can crack when hot jam is added.
Step 2 -Wash, Pit, and Mash the Cherries
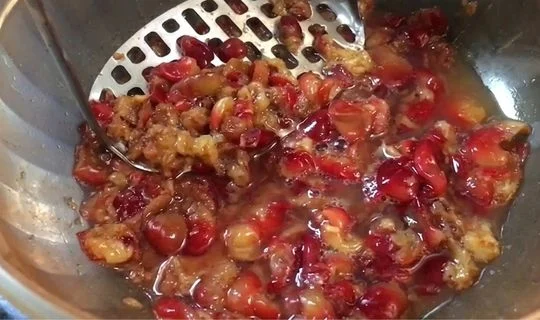
Rinse your fresh cherries under cold running water. Remove stems and pit each cherry using a cherry pitter. Once pitted, use a potato masher to crush and chop the cherries to your preferred consistency -chunkier for a rustic preserve, smoother for a classic spreadable jam.
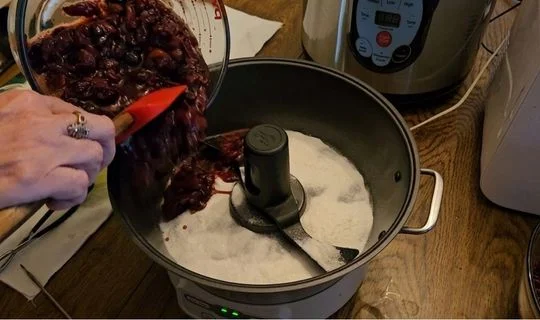
Step 3 -Layer Ingredients into the Jam Maker
Place the jam maker pot on its base. Sprinkle the 3 tablespoons of pectin evenly across the bottom of the pan. Add the mashed cherries on top of the pectin layer. Pour in the 2 tablespoons of bottled lemon juice and add the ½ teaspoon of butter to help reduce foaming during cooking. Finally, evenly disperse the 2 cups of sugar over the top of the entire cherry mixture.
Step 4 -Run the Jam Cycle
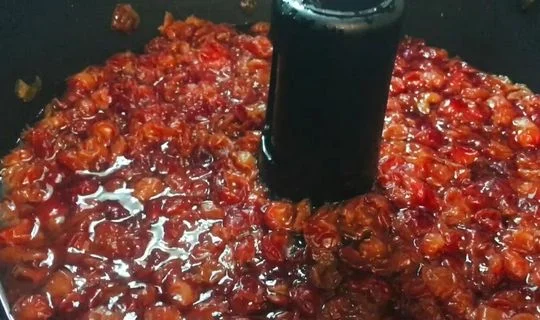
Place the lid on the jam maker, plug it in, and select the “Jam” cycle (21 minutes). Press “Enter” to start. The machine will stir and heat everything automatically -no babysitting required.
Step 5 -Finish and Remove from Heat
Once the machine beeps to signal the end of the cycle, press “Cancel” and unplug the unit immediately. Carefully remove the lid -steam and contents will be extremely hot. Your cherry jam should be glossy, thick, and deeply fragrant.
Step 6 -Fill the Canning Jars
Using a canning funnel and ladle, carefully fill each hot sterilized jar with the hot jam, leaving about ¼ inch of headspace at the top. Wipe the jar rims clean with a damp paper towel to ensure a proper seal.
Step 7 -Seal and Process in a Hot Water Bath
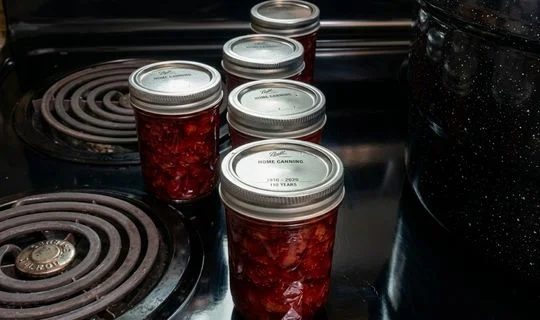
Place sterilized lids on the jars and screw the bands on until “fingertip tight” -snug but not over-tightened. Lower the jars into your hot water bath canner using a jar lifter. Once the water returns to a full boil, process the jars for exactly 10 minutes.
Step 8-Cool and Check Seals
After 10 minutes, turn off the heat, remove the canner lid, and let the jars sit just above the water for 5 minutes. Lift jars out and set them on a folded towel on the counter. Leave undisturbed for a full 24 hours. After cooling, press the center of each lid -if it doesn’t flex or pop, the jar is properly sealed and shelf-stable.
Customization & Serving Ideas for Cherry Jam
This homemade cherry jam is wonderfully versatile. Here are seven delicious ways to customize and serve it:
1. Classic Toast & Butter Pairing
Spread generously over thick-cut sourdough toast with salted butter for the ultimate simple breakfast. The contrast of tangy jam against creamy butter is timeless and deeply satisfying.
2. Cherry Jam Thumbprint Cookies
Fill homemade thumbprint shortbread cookies with a dollop of this cherry jam before or after baking. The jam’s bold cherry flavor pairs beautifully with buttery, crumbly cookie dough -perfect for holiday baking.
3. Swirl into Yogurt or Oatmeal
Stir a spoonful into plain Greek yogurt or morning oatmeal for a naturally fruity sweetener. This is a great reduced-sugar alternative to flavored commercial yogurts.
4. Cheese Board Centerpiece
Serve alongside aged cheddar, creamy brie, or sharp blue cheese on a charcuterie board. Cherry jam’s sweet-tart profile cuts through rich cheese beautifully -a crowd-pleasing pairing for entertaining.
5. Cherry Jam Glazed Meats
Use as a glaze for roasted duck breast, pork tenderloin, or grilled chicken thighs. Combine 2 tablespoons of cherry jam with a splash of balsamic vinegar and brush over meat during the final minutes of cooking.
6. Ice Cream & Dessert Topping
Warm this Ball Cherry Jam Recipe slightly and spoon it over desserts, or serve it alongside our beard papa cream puff recipe and chantilly whole foods cake recipe for an elegant dessert spread featuring complementary flavors and textures.
7. Homemade Cherry Jam Gifting
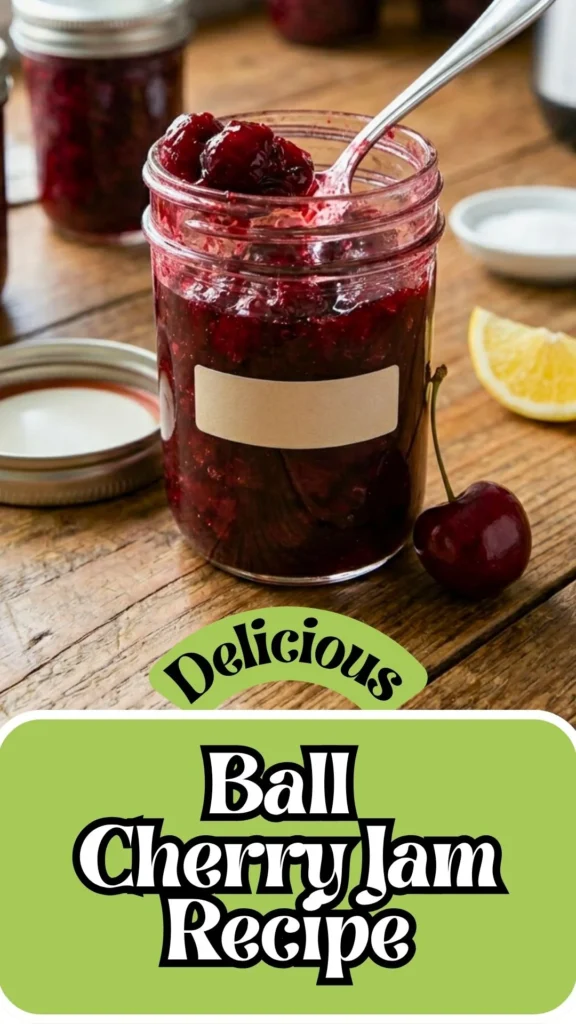
Pour into decorative 4 oz jars, seal with a cloth lid cover and twine, and gift to friends and family. Homemade jam makes a heartfelt, personal gift for holidays, housewarmings, and teacher appreciation events.
Pro Tips for the Perfect Ball Cherry Jam
Follow these expert home canning tips to get a flawless batch every single time:
1. Always Use Bottled Lemon Juice -Not Fresh
For safe home canning, bottled lemon juice is non-negotiable. Its acidity level is standardized, which ensures proper preservation and food safety. Fresh lemon juice has variable acidity and can compromise the safety of shelf-stable canned goods.
2. Choose the Ripest Cherries You Can Find
The flavor of your jam is only as good as your fruit. Use fully ripe, deeply colored sweet cherries -Bing, Rainier, or Montmorency -at peak season for the most intense, natural cherry flavor. Avoid underripe or mushy fruit.
3. Don’t Skip the Butter
That tiny ½ teaspoon of butter does more than you think. It significantly reduces surface foam that forms during jam cooking, giving you a cleaner, glossier final product without skimming.
4. Measure Pectin Precisely
Pectin is a science, not an art. Too little and your jam won’t set; too much and it turns rubbery. Always level off your tablespoons of pectin carefully. Use a reduced-sugar pectin specifically designed for lower-sugar recipes like this one.
5. Fingertip Tight -Not Over-Tightened
When screwing on the bands, apply only fingertip pressure -not full-hand force. Over-tightening prevents air from venting properly during the water bath process, which can compromise the seal.
6. Always Start with Hot Jars
Never pour hot jam into cold jars. Thermal shock can cause the glass to crack and ruin your batch. Keep jars in hot water until the moment you’re ready to fill them.
7. Label Every Jar with the Date
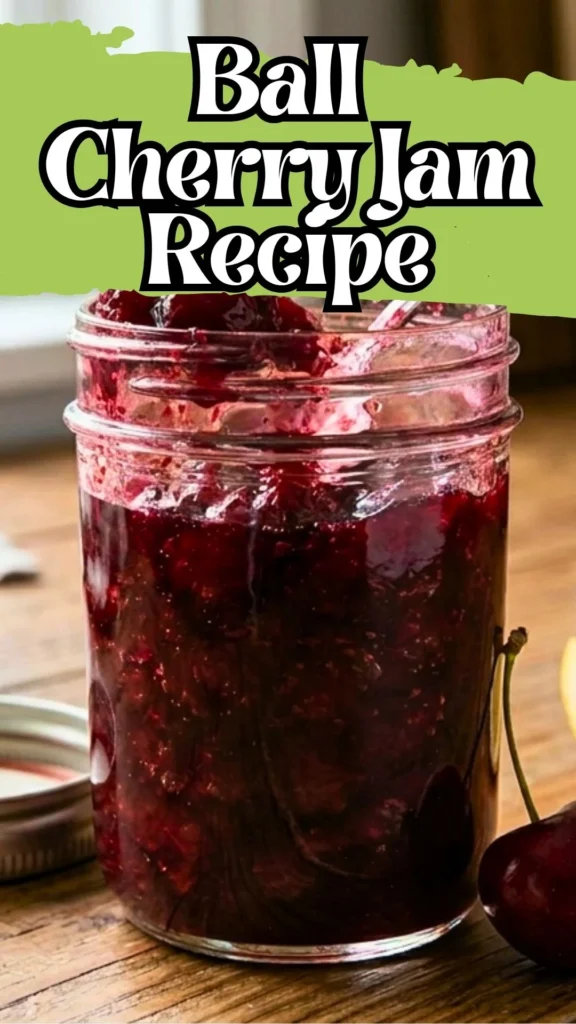
Once cooled and sealed, label each jar with the jam name and the date it was made. This is especially important if you’re making multiple batches or varieties. Properly sealed jars are shelf-stable for up to 18 months, so knowing your oldest jars keeps your pantry rotation efficient.
Storage & Reheating Guidance
| Storage Method | Duration |
|---|---|
| Pantry (sealed & canned) | Up to 18 months |
| Refrigerator (opened or unsealed) | Up to 3 weeks |
| Freezer | Up to 1 year |
Once opened, always refrigerate and use within 3 weeks. If a jar fails to seal after the water bath, refrigerate or freeze it immediately -never leave unsealed jam at room temperature.
Frequently Asked Questions
Can I make this cherry jam without a jam maker?
Yes! If you don’t own an automatic jam maker, combine all the ingredients in a heavy-bottomed saucepan. Bring the mixture to a full rolling boil over medium-high heat, stirring constantly, and boil hard for 1–2 minutes before ladling into jars and proceeding with the hot water bath process.
What type of cherries work best for cherry jam?
Both sweet cherries (like Bing) and tart cherries (like Montmorency) work well. Sweet cherries produce a milder, more dessert-like jam; tart cherries give a more intense, tangy preserve. You can even mix both varieties for a balanced, complex flavor profile.
Why is my cherry jam not setting properly?
Under-setting is usually caused by inaccurate pectin measurement, insufficient boiling time, or fruit that was too watery. If your jam doesn’t set after 24 hours, you can re-process it by reheating, adding a touch more pectin, and re-canning.
Do I have to use reduced-sugar pectin?
This recipe is specifically developed with reduced-sugar pectin in mind, which requires less sugar to gel properly. Using regular pectin will require more sugar and may alter the final flavor and texture of the jam.
Is homemade cherry jam safe for shelf storage?
Yes -when properly canned using a hot water bath and sealed jars, this cherry jam is shelf-stable for up to 18 months. Always verify the seal before consuming and discard any jars that show signs of spoilage, unusual smell, or compromised lids.
Can I double this cherry jam recipe?
Home canning experts, including Ball itself, strongly advise against doubling jam recipes. Larger quantities heat and cook unevenly, which affects the set, flavor, and safety of the final product. For more jam, simply run multiple batches.
Can I reduce the sugar even further?
The 2 cups of sugar in this recipe is already a reduced-sugar quantity calibrated to work with the specific pectin ratio. Reducing it further may prevent the jam from gelling properly. If you want an even lower-sugar version, use a no-sugar-needed pectin variety specifically formulated for minimal sweetener.
Ball Cherry Jam Recipe
If you’ve ever bitten into a spoonful of glossy, ruby-red cherry jam bursting with summer sweetness, you already know why homemade always beats store-bought.
Ingredients
- Fresh Cherries
- Pectin
- Bottled Lemon Juice
- Unsalted Butter
- Granulated Sugar
Instructions
Step 1 -Sterilize Your Canning Equipment
Before anything touches your jam, wash all 8 oz canning jars, lids, and bands thoroughly with hot soapy water. Sterilize them in boiling water or run them through a hot dishwasher cycle. Keep them hot until ready to fill –cold jars can crack when hot jam is added.
Step 2 -Wash, Pit, and Mash the Cherries
Rinse your fresh cherries under cold running water. Remove stems and pit each cherry using a cherry pitter. Once pitted, use a potato masher to crush and chop the cherries to your preferred consistency -chunkier for a rustic preserve, smoother for a classic spreadable jam.
Step 3 -Layer Ingredients into the Jam Maker
Place the jam maker pot on its base. Sprinkle the 3 tablespoons of pectin evenly across the bottom of the pan. Add the mashed cherries on top of the pectin layer. Pour in the 2 tablespoons of bottled lemon juice and add the ½ teaspoon of butter to help reduce foaming during cooking. Finally, evenly disperse the 2 cups of sugar over the top of the entire cherry mixture.
Step 4 -Run the Jam Cycle
Place the lid on the jam maker, plug it in, and select the “Jam” cycle (21 minutes). Press “Enter” to start. The machine will stir and heat everything automatically -no babysitting required.
Step 5 -Finish and Remove from Heat
Once the machine beeps to signal the end of the cycle, press “Cancel” and unplug the unit immediately. Carefully remove the lid -steam and contents will be extremely hot. Your cherry jam should be glossy, thick, and deeply fragrant.
Step 6 -Fill the Canning Jars
Using a canning funnel and ladle, carefully fill each hot sterilized jar with the hot jam, leaving about ¼ inch of headspace at the top. Wipe the jar rims clean with a damp paper towel to ensure a proper seal.
Step 7 -Seal and Process in a Hot Water Bath
Place sterilized lids on the jars and screw the bands on until “fingertip tight” -snug but not over-tightened. Lower the jars into your hot water bath canner using a jar lifter. Once the water returns to a full boil, process the jars for exactly 10 minutes.
Step 8-Cool and Check Seals
After 10 minutes, turn off the heat, remove the canner lid, and let the jars sit just above the water for 5 minutes. Lift jars out and set them on a folded towel on the counter. Leave undisturbed for a full 24 hours. After cooling, press the center of each lid -if it doesn’t flex or pop, the jar is properly sealed and shelf-stable.
Notes
Once opened, always refrigerate and use within 3 weeks. If a jar fails to seal after the water bath, refrigerate or freeze it immediately -never leave unsealed jam at room temperature.
Nutrition Information:
Yield:
16Serving Size:
1Amount Per Serving: Calories: 234
We’d love to know how this recipe works out for you! Give it a try and leave a comment below to share your experience, tips, or any tweaks you made. Don’t forget to follow us on Pinterest and YouTube for more tasty recipes and kitchen inspiration. Your support and feedback truly mean everything to us!