
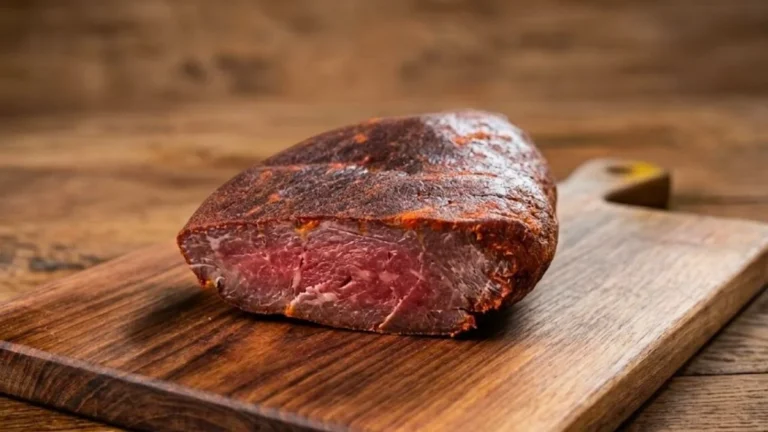

Cecina meat is a traditional Spanish delicacy that transforms simple beef into an artisanal cured masterpiece through time-honored preservation techniques. This cecina meat recipe guides you through the authentic process of making Spanish-style cured beef at home, requiring nothing more than quality meat, salt, patience, and your refrigerator.
Often compared to Italian bresaola or prosciutto, cecina meat in English translates to salt-cured, air-dried beef that develops deep, savory flavors over weeks of careful curing. Learning how to cook cecina meat-or more accurately, how to cure it-connects you to centuries of Spanish culinary tradition.
This cecina meat cut becomes paper-thin slices of intensely flavorful charcuterie perfect for tapas boards and elegant appetizers. Whether you’re an adventurous home cook or charcuterie enthusiast, this cecina meat cooked through traditional curing will reward your patience with restaurant-quality results.
What Does Cecina Meat Taste Like?
Cecina meat delivers an intensely savory, deeply umami-rich flavor profile that’s distinctly different from sweet American jerky. The taste is boldly salty with complex meaty undertones, similar to prosciutto or bresaola but with its own unique Spanish character.
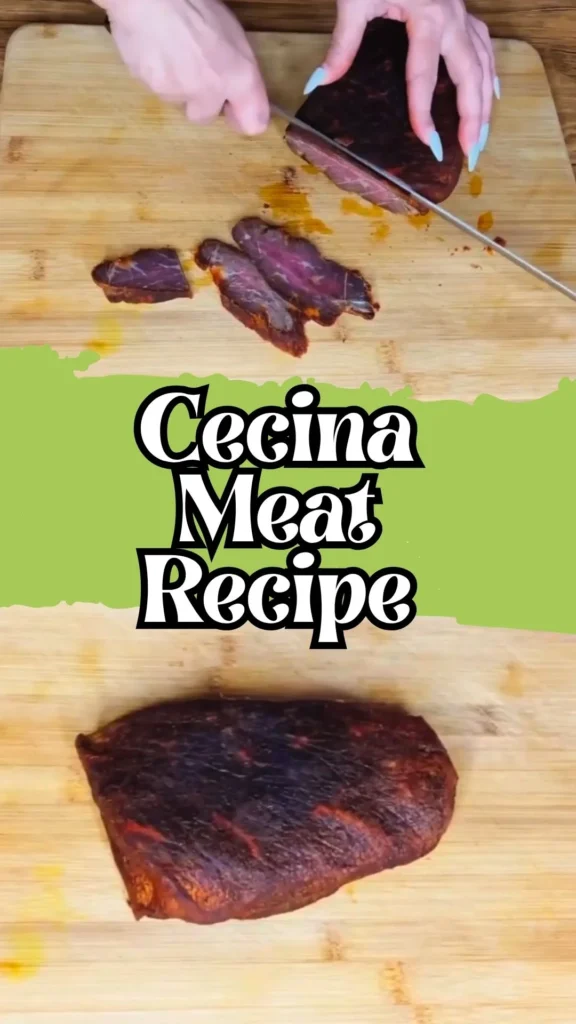
The initial salt cure concentrates the natural beef flavors while the liquid smoke adds a subtle smokiness that doesn’t overpower. The paprika-olive oil coating contributes a gentle sweetness and earthy spice that balances the saltiness beautifully.
When sliced paper-thin, cecina meat cooked through this traditional method has a tender yet firm texture that melts on your tongue. The flavor is robust and sophisticated-perfect for those who appreciate authentic Old World charcuterie. This isn’t a snack meat; it’s a delicacy meant to be savored slowly, paired with good wine, cheese, and crusty bread.
Ingredients and Kitchen Utensils
Phase 1: The Initial Pickle/Marinade
- 1.2 kg (approximately 2.6 lbs) lean beef roast (completely clean, free of fat, nerves, and tendons)
- 2 large garlic cloves, heavily crushed or minced
- 30g to 35g fine sea salt
- 2 to 3 tbsp liquid smoke
Phase 2: The Salt Cure
- 1 to 2 kg coarse sea salt or thick rock salt
Phase 3: The Outer Rub
- 2 to 3 tbsp sweet Spanish paprika
- 4 to 5 tbsp extra virgin olive oil
Kitchen Utensils
- Deep plastic containers with lids for curing
- Plastic wrap
- Flat board or plate for pressing
- Heavy weight (1-2 kg, such as barbell weights or heavy cans)
- Large bowl for desalinating
- Clean kitchen towels
- Metal skewer or butcher’s twine for hanging
- Plate or tray to catch drips
- Very sharp knife or meat slicer for serving
- Small mixing bowls
Preparation and Cooking Time
Prep Time: 30 minutes
Curing/Aging Time: 25 to 30 days
Total Time: Approximately 1 month
Yield: Dozens of paper-thin savory slices
Recipe Instructions
Phase 1: The 48-Hour Wet Pickle
Step 1: Clean the Meat (Day 1) Inspect your cecina meat cut carefully and trim away any exterior skin, silver skin, tendons, or visible fat. The meat must be completely lean and clean to cure properly, as any fat or connective tissue will prevent even curing and can spoil during the aging process.
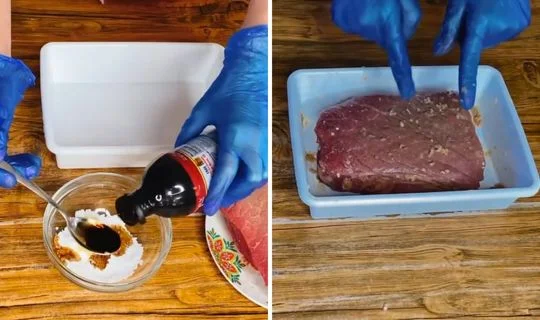
Step 2: Apply the Marinade (Day 1) In a small bowl, combine the fine sea salt, crushed garlic, and liquid smoke into a thick paste. Rub this mixture thoroughly all over every surface of the meat, ensuring complete coverage. Massage it into the meat fibers to help the cure penetrate deeply.
Step 3: First Fridge Rest (Days 1-2, 48 Hours) Place the seasoned meat into a clean container, cover tightly with plastic wrap, and refrigerate for 48 hours. During this time, the salt will draw moisture from the meat, creating a natural brine at the bottom of the container. This is the beginning of the curing process.
Phase 2: The Heavy Salt Pack & Press
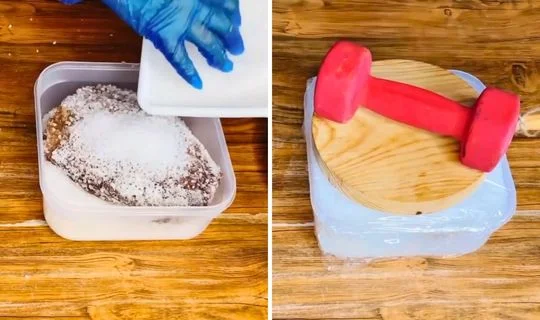
Step 4: Bury in Coarse Salt (Day 3) Remove the meat from the initial container. Prepare a clean, deep container by laying down a thick bed of coarse sea salt at the bottom. Place the meat on top and pour more coarse salt over it until the cecina meat is entirely buried and no longer visible.
Step 5: Apply Weight (Day 3) Cover the salt layer with plastic wrap. Place a flat board or plate on top of the plastic, then add a heavy weight of about 1 to 2 kg on top. This weight presses the meat, compacting the fibers and forcing out additional moisture.
Step 6: Second Fridge Rest (Days 3-4, 48 Hours) Return the weighted container to the refrigerator for another 48 hours. The combination of heavy salt and pressure aggressively extracts moisture and begins transforming the texture of your cecina meat recipe.
Phase 3: Desalination & The Paprika Coating
Step 7: Rinse and Desalinate (Day 5) Remove the meat from the salt pack and thoroughly rinse it under cold running water to remove all surface salt. Submerge the meat in a large bowl of clean, cold water for 1 to 2 hours to desalinate it slightly. Optionally, change the water once halfway through to remove excess salt.
Step 8: Dry Thoroughly (Day 5) Remove the meat from the water and dry it completely using clean kitchen towels. Pat every surface until the cecina meat is entirely dry to the touch before proceeding to the next step.
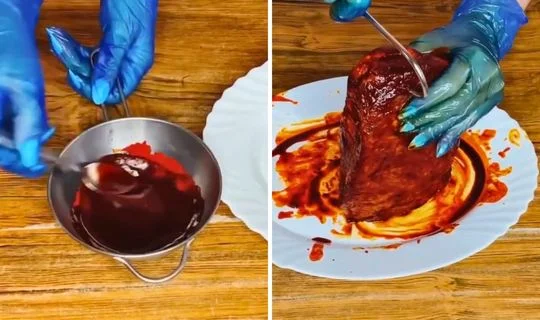
Step 9: Apply the Final Rub (Day 5) Mix the sweet Spanish paprika and olive oil in a bowl to form a thick, paste-like marinade. Using your hands, massage this vibrant red paste all over the meat until it develops a deep, beautiful coating. This creates the characteristic appearance of cecina meat cooked in the traditional Spanish style.
Phase 4: Air-Drying & Aging
Step 10: Hang the Meat (Day 5) Pierce the meat with a clean metal skewer or thread butcher’s twine through one end. Hang it inside your refrigerator in a spot where air can circulate freely around it. Place a plate or tray underneath for the first 2-3 days to catch any drips of oil or marinade.
Step 11: The Long Cure (Days 5-27, Approximately 3 Weeks) Allow the meat to hang undisturbed to air-cure. Keep it in the coldest part of your refrigerator for 20 days minimum. If you live in a cold climate, you can optionally finish the meat by hanging it in front of a cold, open window for the final 7 days. If your home is warm, simply leave it refrigerated for the full 25 to 30 days.
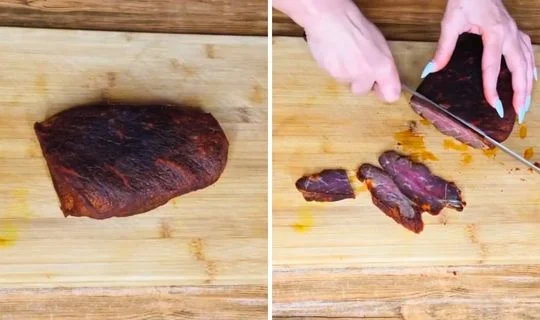
Step 12: Slice and Serve (Day 27+) Once the cecina meat has become dark, firm, and fully cured, it’s ready to enjoy. Use a very sharp knife or meat slicer to shave off paper-thin slices. Serve as part of a charcuterie board with cheese, olives, crusty bread, and wine.
Customization and Pairing Ideas for Serving
1. Classic Charcuterie Board Presentation
Serve your cecina meat alongside traditional Spanish accompaniments like Manchego cheese, Marcona almonds, green olives, and crusty bread. Add membrillo (quince paste) for a sweet contrast to the salty meat, and drizzle quality olive oil over everything. This creates an authentic tapas experience that showcases the cecina as the star ingredient.
2. Cecina and Melon Pairing
Follow the classic Spanish tradition of pairing cured meat with fresh fruit by wrapping thin slices of cecina meat around cubes of cantaloupe or honeydew melon. The sweet, juicy fruit perfectly balances the intense saltiness of the cured beef, creating a refreshing appetizer that’s visually stunning and deliciously complex.
3. Cecina Tostadas
Top toasted baguette slices with a smear of creamy goat cheese or ricotta, then drape with cecina meat and finish with a drizzle of honey and cracked black pepper. You can also add arugula, thinly sliced radishes, or sun-dried tomatoes for additional layers of flavor and texture.
4. Spanish Bocadillo Sandwich
Create a simple yet satisfying sandwich by layering cecina meat in a crusty roll with roasted red peppers, aioli, and fresh greens. This cecina meat recipe transforms into a portable meal that’s perfect for picnics or lunch. Add sliced tomatoes and a splash of sherry vinegar for even more Spanish flair.
5. Cecina Salad Topping
Elevate a simple green salad by tearing cecina meat into bite-sized pieces and scattering it over mixed greens, cherry tomatoes, shaved Parmesan, and toasted pine nuts. The salty, savory meat acts like a protein-rich alternative to bacon bits, adding depth to your vinaigrette-dressed salad.
6. Wine and Beverage Pairings
Cecina meat pairs beautifully with Spanish Tempranillo, Rioja, or Ribera del Duero red wines. For white wine lovers, try an aged Spanish white or dry sherry. The robust, salty flavors also complement Spanish vermouth on ice with an orange slice, or even a cold Spanish beer like Estrella Galicia.

7. Serve It with Our Recipes
Try this Cecina Meat Recipe for a rich, smoky meal, and serve it with our Garden Vegetable Rice Recipe and olive garden house salad recipe for a balanced, satisfying dining experience.
Essential Tips for Perfect Cecina Meat
1. Choose the Right Cut
Success with this cecina meat recipe starts with selecting the proper beef cut. Look for lean roasts like eye of round, top round, or bottom round-cuts that are naturally lean with minimal marbling. Avoid well-marbled cuts like ribeye or chuck, as the fat will not cure properly and can turn rancid during the long aging process. The meat should be one solid piece without separations.
2. Maintain Refrigerator Temperature Consistency
Your refrigerator temperature is critical when learning how to cook cecina meat through curing. Keep your fridge between 35°F and 40°F throughout the entire process. Temperature fluctuations can encourage bacterial growth or prevent proper moisture evaporation. Avoid opening and closing the fridge door excessively near the hanging meat, and position it away from the door where temperatures are most stable.
3. Don’t Skip the Desalination Step
After the heavy salt cure, your cecina meat will be extremely salty. The desalination soak in fresh water is not optional-it removes excess surface salt and makes the final product enjoyable rather than inedibly salty. If you prefer a less intense salt flavor, extend the soaking time to 3 hours, changing the water twice during the process.
4. Monitor the Drying Environment
Proper air circulation is essential for even curing and preventing spoilage. Make sure your cecina meat cut hangs freely without touching the refrigerator walls or other items. If your fridge is very humid, place a small container of baking soda or activated charcoal nearby to absorb excess moisture. In very dry environments, the meat may cure faster than expected, so check it after 20 days.
5. Use Quality Salt
This traditional recipe relies entirely on salt for preservation, so quality matters. Use pure sea salt or kosher salt without iodine or anti-caking agents, which can create off-flavors. Coarse salt works best for the heavy cure phase because it draws moisture more aggressively, while fine salt penetrates better during the initial marinade phase.
6. Adjust Curing Time to Preference
The total curing time for cecina meat cooked in this traditional style varies based on your texture preference and climate conditions. For a softer, less intensely cured product, remove it after 20-23 days. For traditional firm cecina that slices paper-thin, wait the full 27-30 days. The meat should feel firm throughout but not rock-hard-it should still have slight give when pressed.
7. Slice Thin for Best Experience
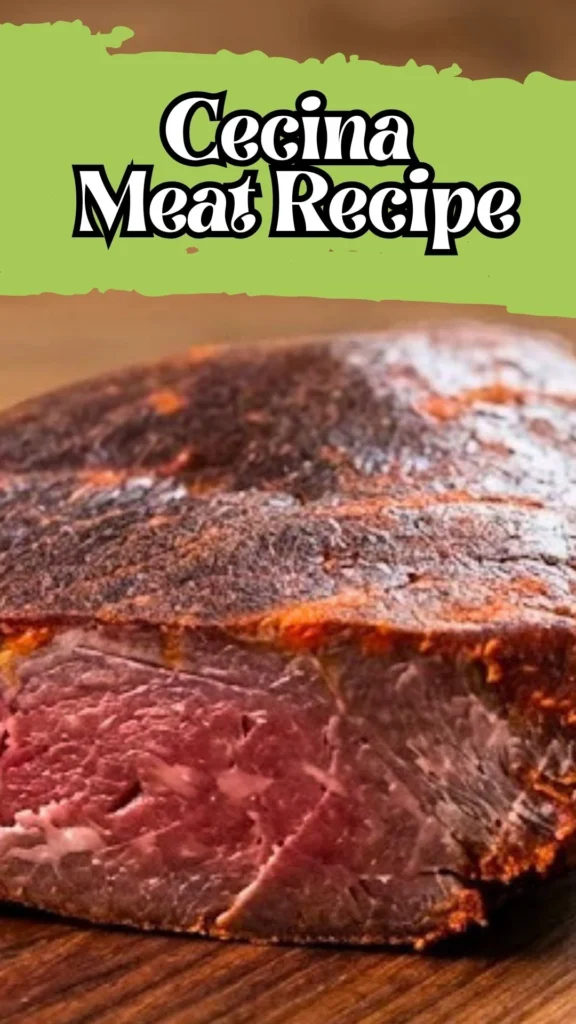
Cecina meat is meant to be sliced as thin as possible, almost translucent. A sharp slicing knife works, but a meat slicer produces the best results. Partially freezing the cured meat for 30-60 minutes before slicing makes it easier to achieve those beautiful, paper-thin slices that showcase the meat’s texture and allow the flavors to bloom on your palate properly.
Storage and Reheating Guidance
Store finished cecina meat wrapped in parchment paper, then placed in an airtight container in the refrigerator for up to 3 months. The low moisture content acts as a natural preservative. For longer storage, vacuum-seal portions and freeze for up to 6 months. Cecina is served cold or at room temperature-never reheat cured meats, as heat destroys their delicate texture and concentrated flavors.
Common Queries and FAQs
Here, we’ve got you covered with some common questions that people often ask
What does cecina meat in English mean?
Cecina meat in English refers to salt-cured, air-dried beef that originates from Spain, particularly the León region. It’s similar to Italian bresaola or South African biltong but follows traditional Spanish curing methods with distinctive paprika coating. The term “cecina” can also refer to cured horse meat in some regions, though beef is most common.
Is cecina meat safe to eat without cooking?
Yes, when prepared properly following this cecina meat recipe, the curing process makes the meat safe to eat without further cooking. The heavy salt cure and extended drying period eliminate harmful bacteria and preserve the meat naturally. This is the same preservation method used for prosciutto, salami, and other traditional charcuterie that has been safely consumed for centuries.
Can I use a different meat besides beef for cecina?
Traditionally, cecina can be made from beef, horse, or goat meat. Venison, elk, or other lean game meats also work well with this method. The key requirement is that the meat must be extremely lean with minimal fat content. Avoid pork for this particular recipe, as pork requires different curing methods and salt ratios for safe preservation.
How do I know when my cecina meat is fully cured?
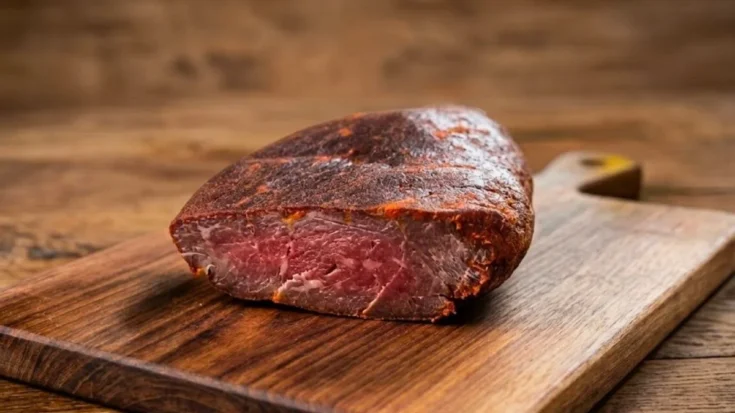
Your cecina meat cut is fully cured when it feels firm throughout with no soft spots, has darkened significantly in color, and has lost approximately 30-40% of its original weight through moisture evaporation. The exterior should be dark red from the paprika coating, and the meat should slice cleanly without releasing any liquid when cut.
Why is my cecina meat too salty?
If your finished cecina tastes overly salty, you likely didn’t soak it long enough during the desalination step on Day 5. Next time, extend the fresh water soak to 2-3 hours and change the water at least once. You can also slice already-cured cecina very thin, which makes the saltiness less intense per bite, or serve it with bread and cheese to balance the flavors.
Can I cure cecina meat without liquid smoke?
Yes, liquid smoke is optional and adds a smoky dimension but isn’t essential to the basic cecina meat recipe. Traditional Spanish cecina relies primarily on salt curing and air drying for flavor development. If you omit the liquid smoke, your cecina will have a purer beef flavor with the characteristic paprika notes but without the smoky undertone.
What’s the difference between cecina and beef jerky?
While both are preserved beef, cecina meat cooked through traditional curing is salt-cured and air-dried whole, then sliced paper-thin for serving. It has an intensely savory, salty flavor similar to prosciutto. American beef jerky is typically marinated in sweet and savory seasonings, then dehydrated in strips with a chewy texture. Cecina is a delicacy meat for charcuterie boards, while jerky is a portable snack food.
Do I need any special equipment to make cecina?
No specialized equipment is required for this cecina meat recipe. You only need a regular refrigerator, basic containers, and patience. A meat slicer makes serving easier but isn’t essential-a very sharp knife works fine. Unlike some cured meats that require humidity-controlled curing chambers, cecina can be successfully made in any standard home refrigerator.
Cecina Meat Recipe
Cecina meat is a traditional Spanish delicacy that transforms simple beef into an artisanal cured masterpiece through time-honored preservation techniques. This cecina meat recipe guides you through the authentic process of making Spanish-style cured beef at home, requiring nothing more than quality meat, salt, patience, and your refrigerator.
Ingredients
- 1.2 kg (approximately 2.6 lbs) lean beef roast (completely clean, free of fat, nerves, and tendons)
- 2 large garlic cloves, heavily crushed or minced
- 30g to 35g fine sea salt
- 2 to 3 tbsp liquid smoke
- 1 to 2 kg coarse sea salt or thick rock salt
- 2 to 3 tbsp sweet Spanish paprika
- 4 to 5 tbsp extra virgin olive oil
Instructions
Phase 1: The 48-Hour Wet Pickle
Step 1: Clean the Meat (Day 1) Inspect your cecina meat cut carefully and trim away any exterior skin, silver skin, tendons, or visible fat. The meat must be completely lean and clean to cure properly, as any fat or connective tissue will prevent even curing and can spoil during the aging process.
Step 2: Apply the Marinade (Day 1) In a small bowl, combine the fine sea salt, crushed garlic, and liquid smoke into a thick paste. Rub this mixture thoroughly all over every surface of the meat, ensuring complete coverage. Massage it into the meat fibers to help the cure penetrate deeply.
Step 3: First Fridge Rest (Days 1-2, 48 Hours) Place the seasoned meat into a clean container, cover tightly with plastic wrap, and refrigerate for 48 hours. During this time, the salt will draw moisture from the meat, creating a natural brine at the bottom of the container. This is the beginning of the curing process.
Phase 2: The Heavy Salt Pack & Press
Step 4: Bury in Coarse Salt (Day 3) Remove the meat from the initial container. Prepare a clean, deep container by laying down a thick bed of coarse sea salt at the bottom. Place the meat on top and pour more coarse salt over it until the cecina meat is entirely buried and no longer visible.
Step 5: Apply Weight (Day 3) Cover the salt layer with plastic wrap. Place a flat board or plate on top of the plastic, then add a heavy weight of about 1 to 2 kg on top. This weight presses the meat, compacting the fibers and forcing out additional moisture.
Step 6: Second Fridge Rest (Days 3-4, 48 Hours) Return the weighted container to the refrigerator for another 48 hours. The combination of heavy salt and pressure aggressively extracts moisture and begins transforming the texture of your cecina meat recipe.
Phase 3: Desalination & The Paprika Coating
Step 7: Rinse and Desalinate (Day 5) Remove the meat from the salt pack and thoroughly rinse it under cold running water to remove all surface salt. Submerge the meat in a large bowl of clean, cold water for 1 to 2 hours to desalinate it slightly. Optionally, change the water once halfway through to remove excess salt.
Step 8: Dry Thoroughly (Day 5) Remove the meat from the water and dry it completely using clean kitchen towels. Pat every surface until the cecina meat is entirely dry to the touch before proceeding to the next step.
Step 9: Apply the Final Rub (Day 5) Mix the sweet Spanish paprika and olive oil in a bowl to form a thick, paste-like marinade. Using your hands, massage this vibrant red paste all over the meat until it develops a deep, beautiful coating. This creates the characteristic appearance of cecina meat cooked in the traditional Spanish style.
Phase 4: Air-Drying & Aging
Step 10: Hang the Meat (Day 5) Pierce the meat with a clean metal skewer or thread butcher’s twine through one end. Hang it inside your refrigerator in a spot where air can circulate freely around it. Place a plate or tray underneath for the first 2-3 days to catch any drips of oil or marinade.
Step 11: The Long Cure (Days 5-27, Approximately 3 Weeks) Allow the meat to hang undisturbed to air-cure. Keep it in the coldest part of your refrigerator for 20 days minimum. If you live in a cold climate, you can optionally finish the meat by hanging it in front of a cold, open window for the final 7 days. If your home is warm, simply leave it refrigerated for the full 25 to 30 days.
Step 12: Slice and Serve (Day 27+) Once the cecina meat has become dark, firm, and fully cured, it’s ready to enjoy. Use a very sharp knife or meat slicer to shave off paper-thin slices. Serve as part of a charcuterie board with cheese, olives, crusty bread, and wine.
Notes
Store finished cecina meat wrapped in parchment paper, then placed in an airtight container in the refrigerator for up to 3 months. The low moisture content acts as a natural preservative. For longer storage, vacuum-seal portions and freeze for up to 6 months. Cecina is served cold or at room temperature-never reheat cured meats, as heat destroys their delicate texture and concentrated flavors.
Nutrition Information:
Yield:
4Serving Size:
1Amount Per Serving: Calories: 723
We’d love to know how this recipe works out for you! Give it a try and leave a comment below to share your experience, tips, or any tweaks you made. Don’t forget to follow us on Pinterest and YouTube for more tasty recipes and kitchen inspiration. Your support and feedback truly mean everything to us!